.png)
In this tutorial, we are going to demystify blockchain technologies and the concept of cryptocurrency by letting you create your own token. First off, it's important to distinguish “coins” from “tokens”—a coin is the native currency of a particular blockchain (e.g. Ether is Ethereum’s coin) while tokens are tradable assets living on a host blockchain. Here is a list of tokens by market capitalisation. Tokens don’t have their own blockchain, instead they are emitted and managed by a smart contract on a host blockchain. We will unpack that point later.
You don't need any particular skills or knowledge to follow this tutorial, it’s equally useful for novice users, but before we start, we need to define three things:
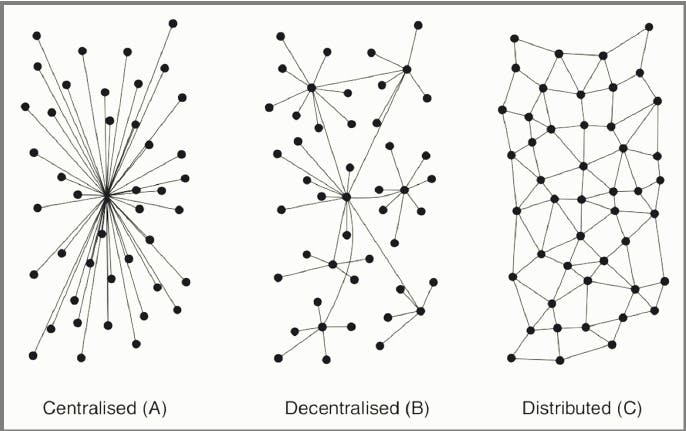
- Decentralised: anything that doesn’t rely on a single entity, but rather on a distributed network (see the image below). In the cryptocurrency world, entities are connected to nodes, and nodes are connected between them.
- Ethereum: You can imagine it as a single “decentralised computer connected and running on the Internet”. Remember the old days when you had to pay to use a computer in a cyber café? Well, it’s kind of the same thing, you can pay (with the Ether cryptocurrency) to use this global computer, which is composed of all the interconnected nodes.
- Smart contract: The Ethereum global computer is a bit different from the one you’re using to read this article. Meaning that standard programs and apps you run on your computers and smartphones cannot run on the Ethereum computer. Smart contracts are a kind of program or entities written in a specific language that can be executed on the Ethereum network.
1. Set up an Ethereum wallet
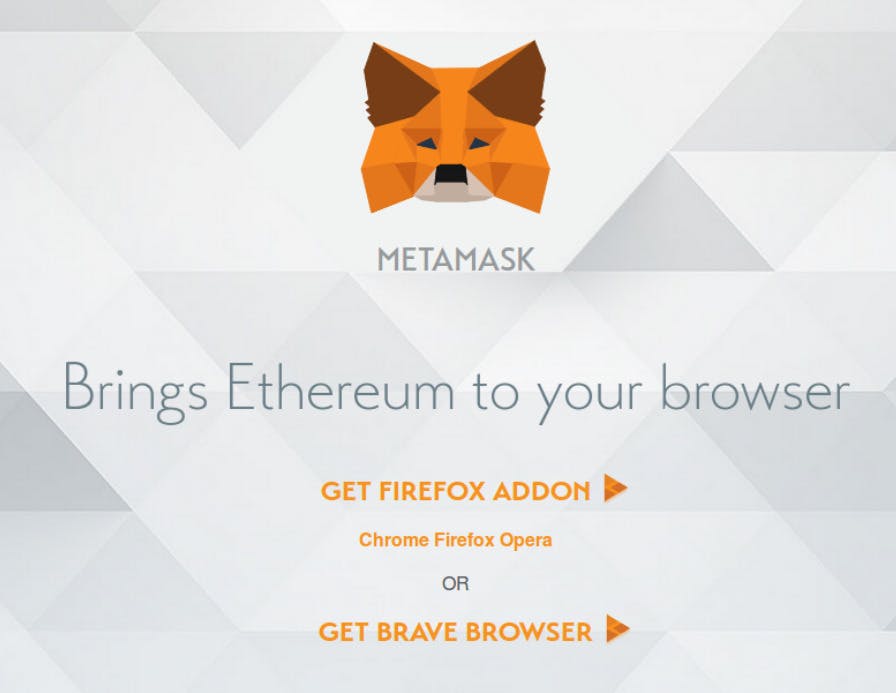
First, you are going to need an ethereum wallet. In the cryptosphere, a wallet refers to a blockchain client. It allows you to interact with the blockchain and to store coins and tokens. The easy path to get your wallet is to install the browser extension Metamask.
Go ahead and install the chrome extension.
Once Metamask is installed, you'll be prompted to input an 8+ character password.
At some point you'll be prompted with a 12-word pass phrase which lets you create your wallet and automatically add it to your Metamask account. Store it somewhere safe and offline. For a main network wallet, it’s common to write it down on a piece of paper and lock it somewhere safe. For the sake of simplicity and because we will be working with test coins, a simple .txt file works.
To make certain you have written down the 12-word pass phrase you will be prompted to input it again.
At this point your wallet is fully set up. You might be prompted to buy coin, but just click on ‘get access to my ether wallet’.
2. Get some coins
In order to start deploying smart contracts, you will need some coins. Indeed, in order to process transactions on the Ethereum network, you have to pay a small transaction fee. This fee is paid in what is called "Gas", you can think of it as the computational power your transaction will cost on the decentralised Ethereum computer, and therefore the fee you will have to pay to use the network.
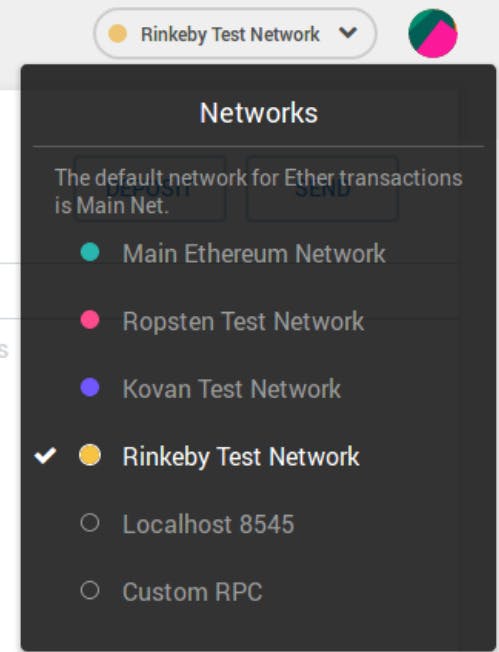
We will be using the Rinkeby testnet. This network implements the exact same protocol as Ethereum but testcoins are free (thus worthless), it is used to test contracts before uploading them to the main network. You can imagine it as a free "sandbox" for developers.
First you will need your Ethereum Rinkeby testnet address:
- Open Metamask, select Rinkeby testnet.
- Click on "Account 1" to copy your address to the clipboard, you'll need to paste it on the faucet to get testnet Ethereum
- Go here and follow the procedure, you’ll have to post your Ethereum address to a social network (Twitter, Facebook, Google+).
- Get back to Metamask and check that your coins have been sent (make sure the Rinkeby network is selected). This process shouldn’t take long.
When completed, you'll see your fresh new Ether in Metamask.
3. Create and deploy your ERC20 token
In order to start developing smart contracts, you will need a Solidity development environment. Solidity is the native Ethereum smart contract development language. If you are familiar with Javascript, Solidity will seem very familiar. There are plenty of ways to write, compile and deploy Solidity contracts, but the easy way (and the method recommended by the Ethereum community) is remix IDE.
Quick tip: Don’t be intimidated by the last paragraph. You can continue this step without having any programming skills. You just need to know that an IDE (integrated development environment) is a tool that lets you write and execute code.
Remix is a web based IDE, so you can access it through your browser or download the app. For the sake of simplicity, we will use the web app.
Go ahead and access remix IDE. On the left side select ballot.sol and delete the code (if you prefer, like me, a darker interface you can choose the "Dark Theme" in the "Settings" tab).
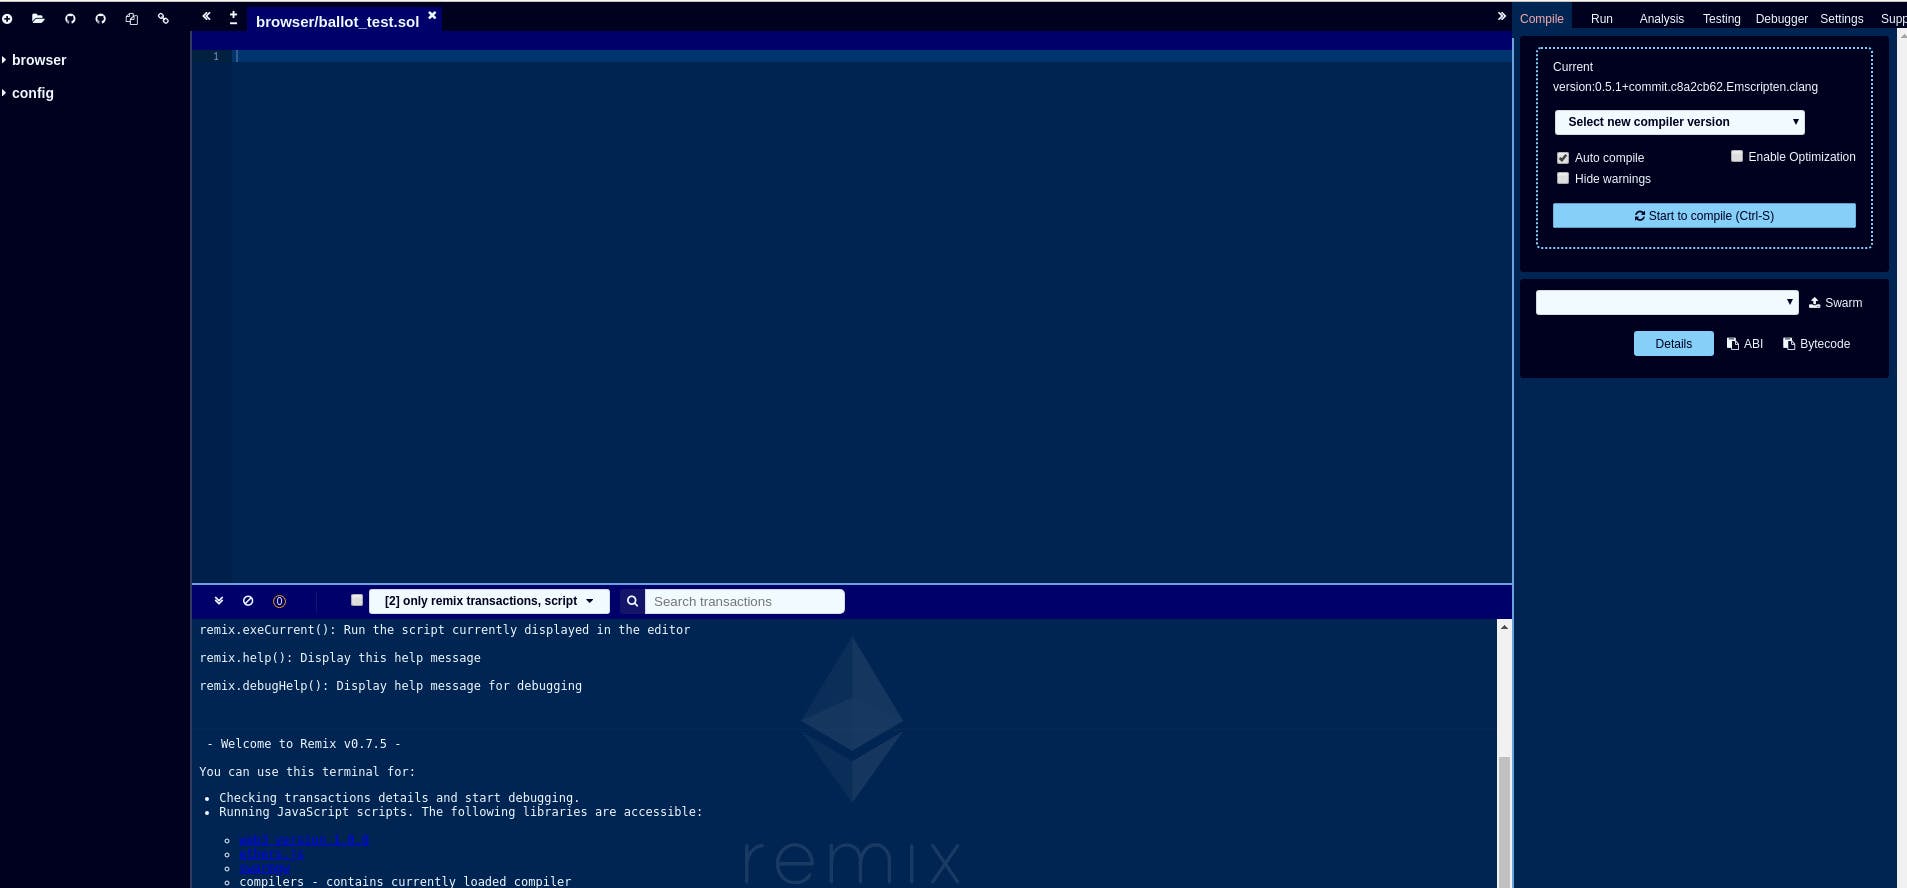
Now add the following code instead (You can read the code if you want to, but it’s not compulsory to understand it to continue):
pragma solidity >=0.4.0 <0.6.0;

/**

* @title ERC20Basic

* @dev Simpler version of ERC20 interface

* @dev see https://github.com/ethereum/EIPs/issues/179

*/

contract ERC20Basic {

 function totalSupply() public view returns (uint256);

 function balanceOf(address who) public view returns (uint256);

 function transfer(address to, uint256 value) public returns (bool);

 event Transfer(address indexed from, address indexed to, uint256 value);

}

contract BasicToken is ERC20Basic {

 mapping(address => uint256) balances;

 uint256 totalSupply_;

 /**

 * @dev total number of tokens in existence

 * @return totalSupply_ An uint256 representing the total amount of Tokens ever issued.

 */

 function totalSupply() public view returns (uint256) {

   return totalSupply_;

 }

 /**

 * @dev Gets the balance of the specified address.

 * @param _owner The address to query the the balance of.

 * @return An uint256 representing the amount owned by the passed address.

 */

 function balanceOf(address _owner) public view returns (uint256) {

   return balances[_owner];

 }

 /**

 * @dev transfer token for a specified address

 * @param _to The address to transfer to.

 * @param _value The amount to be transferred.

 */

 function transfer(address _to, uint256 _value) public returns (bool) {

   require(_to != address(0));

   require(_value <= balances[msg.sender]);

   balances[msg.sender] = balances[msg.sender] - _value;

   balances[_to] = balances[_to] + _value;

   emit Transfer(msg.sender, _to, _value);

   return true;

 }

}

/**

* @title Jug Token

*

*/

contract PaloToken is BasicToken {

   string public constant name = "PaloToken";

   string public constant symbol = "PITT";

   uint8 public constant decimals = 8;

   uint256 public ethRaised_ = 0;


   function buyToken() public payable {

       uint tokens = msg.value * 1000000;

       balances[msg.sender] = balances[msg.sender] + tokens;

       ethRaised_ = ethRaised_ + msg.value;

       totalSupply_ = totalSupply_ + tokens;

   }

    constructor() public{

       totalSupply_ = 500000000000;

       balances[msg.sender] = totalSupply_;

       emit Transfer(address(0), msg.sender, totalSupply_);

   }

}
ERC20 is a smart contract standard to implement tokens on Ethereum. If you want more details, check the official wiki page about ERC20 tokens.
At line 56, inside the "contract PaloToken is BasicToken", you can change the token name from "PaloToken" and symbol "PITT" to whatever you want. The symbol is your token symbol—a "shorter" name, like a ticker symbol as used on the stock market (e.g. BTC for Bitcoin, FB for Facebook).
Now we need to run the code so we can create a smart contract, then we have to deploy it to the test network:
- Step 1: Select the right compiler. The compiler will “translate” the code into a language computers can understand (only composed of “0” and “1”). On the upper right side of your ‘Remix’ window, click on "Select new compiler version", then choose the "0.5.2+commit1df8f40c" as shown in red in the following screenshot:
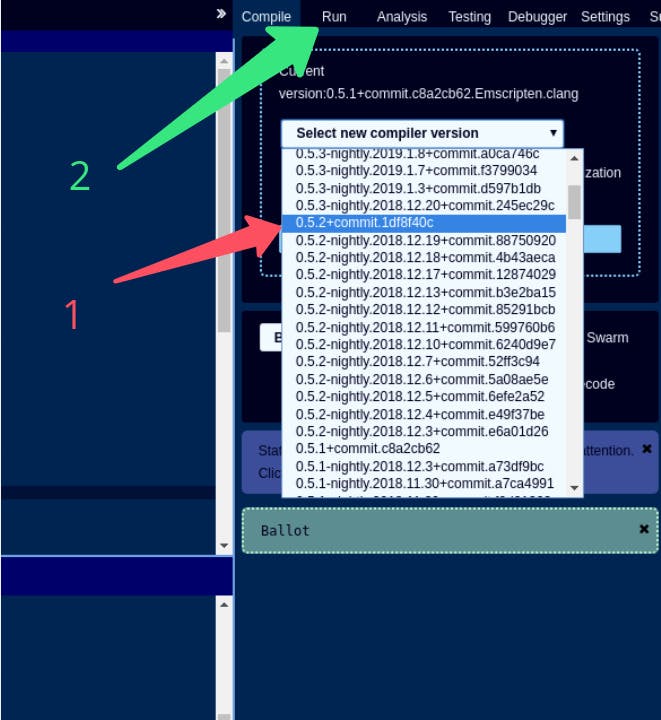
- Step 2: Select the ‘Run’ tab on the upper right side (shown in green).
- Step 3: Select ‘PaloToken’ on the right side panel instead of ‘BasicToken’ (see the orange arrow in the next screenshot). If you only choose ‘BasicToken’, you will have a non-standard ERC20 token, and you'll have very few functionalities:
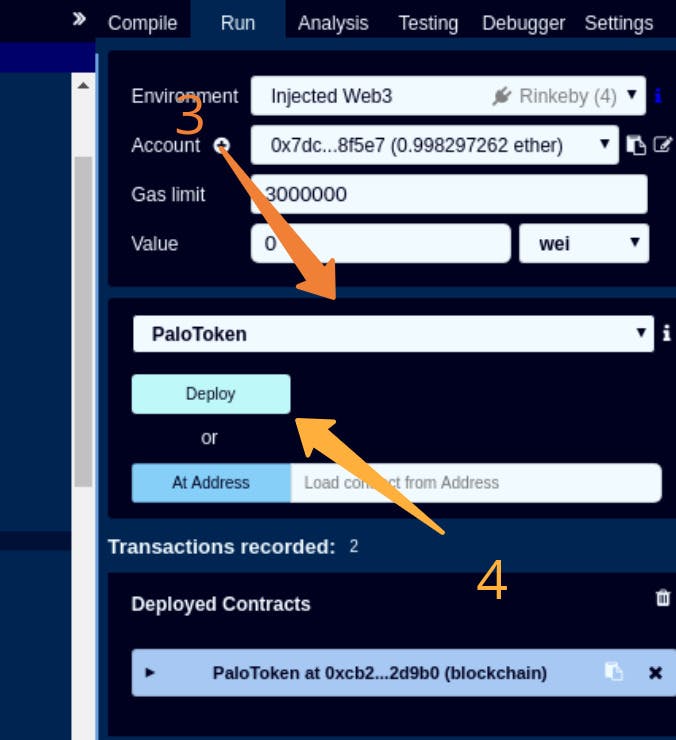
- Step 4 : Click on ‘Deploy’
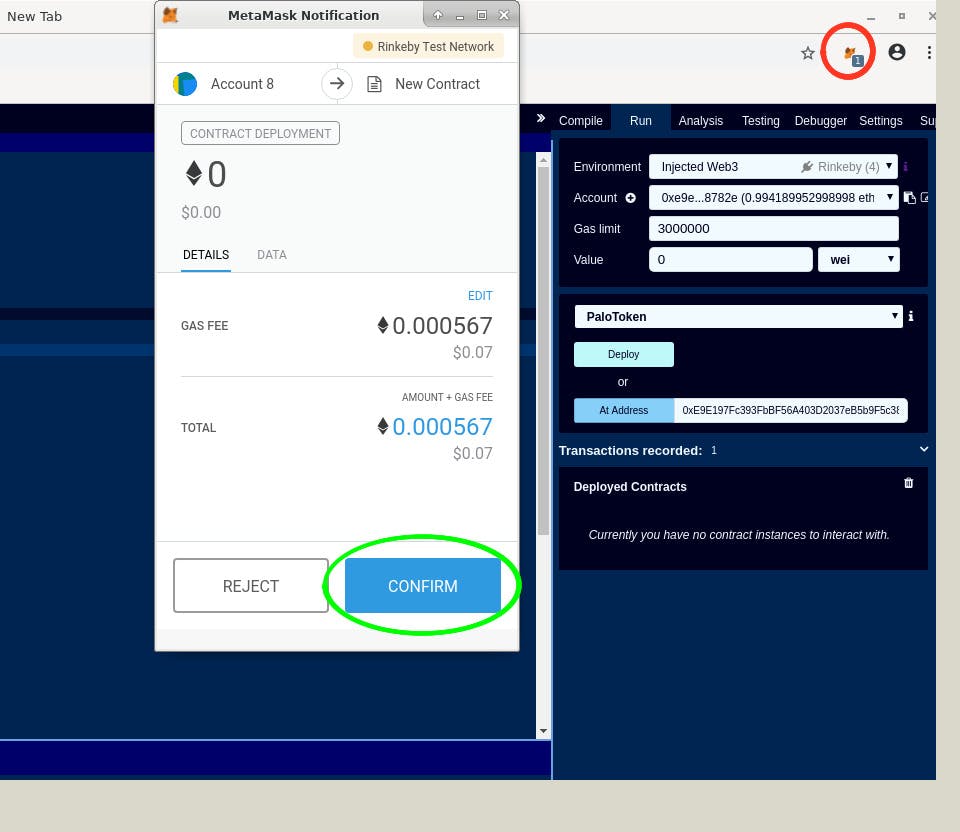
You should now have a Metamask popup window open. If not you should see a notification on the Metamask icon in your browser (see the red circle). Confirm your transaction by clicking on the ‘confirm’ button:
You are now able to see your deployed contract:
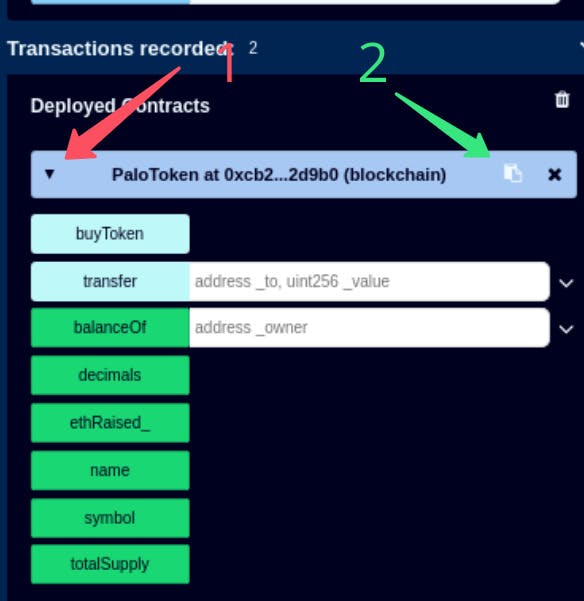
Expand your contract, and click on the ‘copy’ button shown in green to copy your contract address.
Now go to https://rinkeby.etherscan.io/ and paste your contract address in the search form in the upper right:
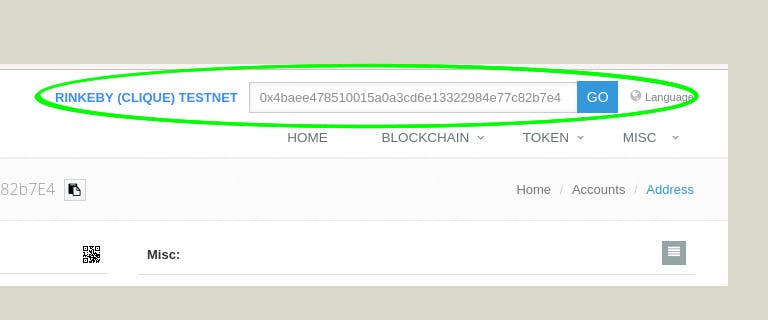
If everything worked fine you'll see something like this:
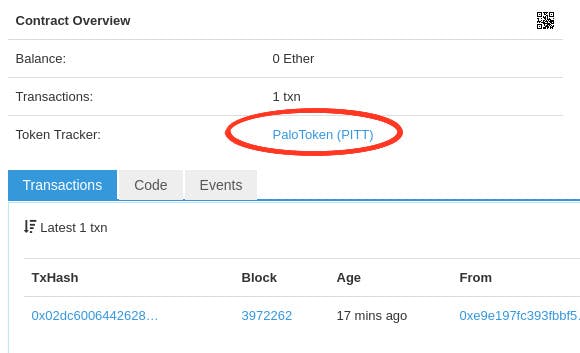
You can now click on your token name next to "Token Tracker". You'll get information like the total supply, the number of token holders, the full transactions record, etc...
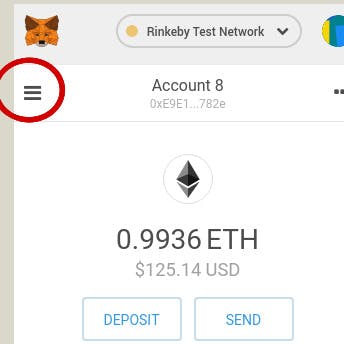
Open Metamask again. click on the menu on the upper left, then scroll down and choose ‘Add Token’:
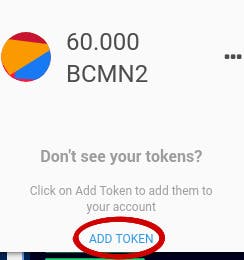
Then choose ‘Custom Token’ and paste your contract address—the same one that you had to copy in Etherscan to check your token creation process—in the ‘Token Contract Address’ field. It will automatically fill the other fields:
- Symbol
- Decimal represents the maximum number of decimals you can divide each coin by (like 0.0001 PTT)
Now click ‘Next’ and ‘Add Token’. Wait a moment... Congratulations! You just created a brand new cryptocurrency! You now own 5,000 coins of your own token.
4. Give me some tokens!
I deserve it as I helped you creating your first cryptocurrency 😁! Open Metamask again, and select your coin on the menu that appears by clicking the top-left button. Now hit the ‘Send’ button. Insert my address on the ‘Recipient address’ field: 0xE9E197Fc393FbBF56A403D2037eB5b9F5c38782e
Pay attention to the ‘advanced option’ link on the bottom, we may use it if the transaction fails. Remember we are on a testnet, it is much less stable than the Ethereum Mainnet (the real production network).
If everything worked, Metamask will prompt you, saying that your attempt was a success. First, let me thank you for your coins.
Now, have a look at the public ledger: https://rinkeby.etherscan.io/address/0xe9e197fc393fbbf56a403d2037eb5b9f5c38782e#tokentxns
If it failed, try again, but this time you'll have to hit the ‘Advanced options’ and increase the gas limit (let's say to 10,000,000).
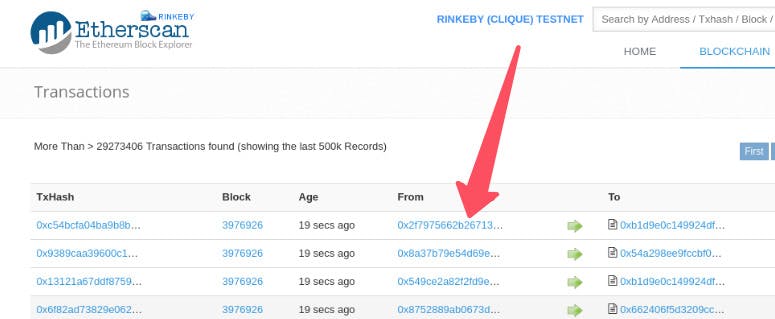
This is my ERC20 token wallet. It may be deleted in the near future as tests network often get wiped clean due to stability issues or other reasons. If this happens, follow this link and pick an address randomly from the ‘From’ field, and click on it:
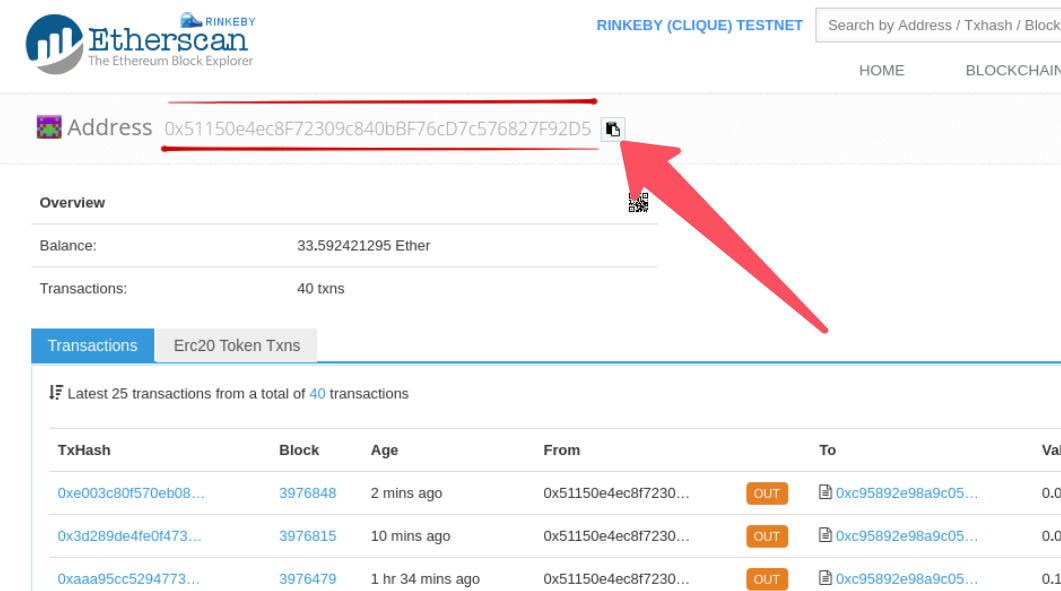
Then copy this address (click the button on the right):
5. Bonus: The first step in launching your ICO
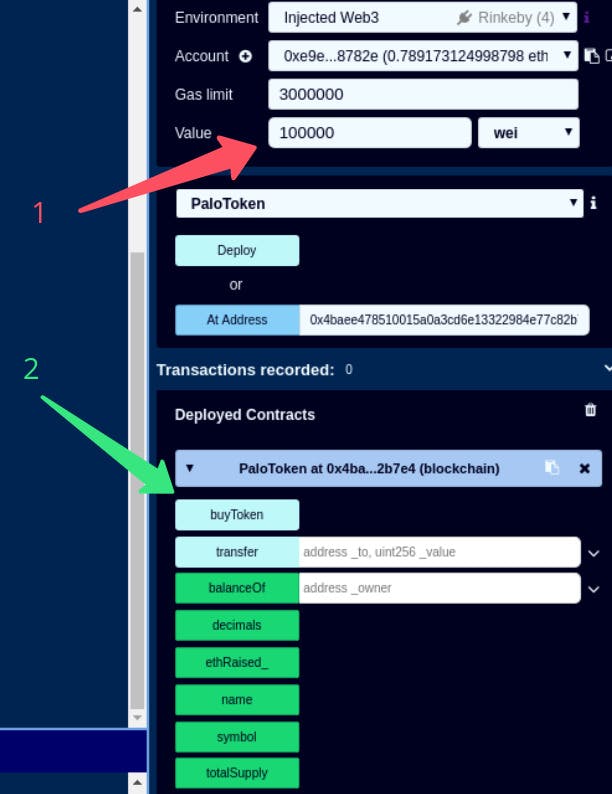
Go back to Remix and have a look at the right panel. In ‘Value’ input 100,000 wei (that's 0.0000000000001 Ether). Step 1 in red. Hit the ‘buyToken’ button (don't forget to expand your deployed contract interface by clicking on it if it hasn't been done before). Step 2 is shown in green.
Accept your transaction (abbreviated as "Tx") in Metamask.
Congratulations! You’ve now received some newly generated tokens in exchange them for Ether! This is exactly how things are playing out with ICOs. You send them Bitcoin, Ethereum, or another cryptocurrency and they give you back their own token. Right now you can only do it via Remix or some other simple solution.
Your next step would be creating a website with a nice front-end interface so you can easily interact with your contract, and spread it on the Internet.
After reading this tutorial, hopefully you’ve realised that creating a personalised cryptocurrency isn't so difficult. Someone with little programming skill can add many functionalities and even start to raise funds.