
Many front-end developers shy away from Webpack, much less tackle it head-on. The nature of Webpack is as such, that it has too many configuration options and tinkering with it could break the application. So this article attempts to simplify major concepts in the building of a frontend project specifically with React.
Sprinkled in the article are little tips to prepare for Webpack 4.0!
What is Webpack?
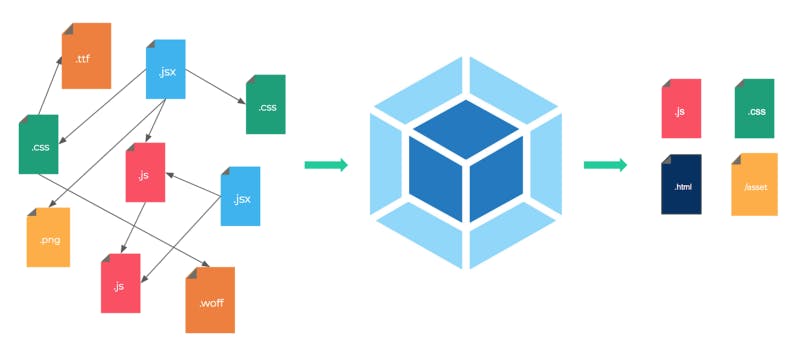
A frontend application has multiple files, .js, .jsx, .png, .jpg, .css, .ttf. We cannot possibly take these bunch of files and dump it in the production web server. The performance load time and overheads will be ghastly.
What we need is a single bundled file of js that holds the structure and logic of the components and application, a single file of CSS for styles, and HTML file to render the DOM and an assets folders for images and fonts.
There have been many tools and task runners that have helped in the bundling process. But Webpack has emerged to be the one-stop solution for many React frontend developers.
Setup
To get started, we have to install webpack and webpack-cli.
npm install webpack -g
npm install webpack-cli -g
We also need a basic project to bundle up. For that we can create a new folder called, ‘react-webpack’.
mkdir react-webpack
We need a package.json file in our project, that would later be required to define our start scripts. Change directory into the ‘my-app’ folder and run npm init.
cd react-webpack
npm init
Create a index.js file that will serve as the entry point to the Webpack.
touch index.js
In the index.js, we can add a simple console.log.
console.log('Hello World')
We can now use the webpack-cli to bundle this index.js into dist/bundle.js.
webpack index.js dist/bundle.js
And the minified code, in bundle.js, would look something like this:
...(function(module, exports) {\n\neval(\"console.log('Hello Worl...
*Update
In the latest webpack-cli version,
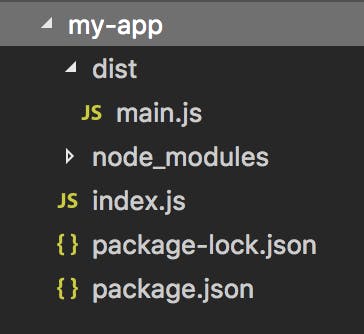
Simply calling ‘webpack index.js’ will auto-generate a distribution folder and bundled file called ‘main.js’
The project structure should look like this at this point:
But as the code base grows, it is impossible to keep using the ‘webpack-cli’ to bundle the code, for every change we make. So what Webpack allows us to do, is to feed it a configuration object that consists of 5 important features.
- Entry / Output
- Dev Server
- Loaders
- Plugins
- Mode
Entry / Output
First up, we need to create a file for the configuration.
touch webpack.config.js
In that file, ‘webpack’ library is required, along with declaration of the config object and finally to export this config object that will be fed to Webpack.
Next, you guessed it right, we have to populate the configuration object.
Context
As a good practice, all the source files should be in a separate folder and not in the root folder. Specifying context tells Webpack to look for all source files, starting from ‘index.js’, hereon. This eliminates the need to add dots and slashes, using the relative path, to get to a specific file. To set this up, we require the ‘path’ library to help map out the absolute paths.
npm install --save-dev path
Entry
Since we have set up the context or the base directory, the entry file can be stated as just ‘index.js’ instead of ‘./index.js’. This is where Webpack starts to chart its dependency graph.
Output
The output file is what the Webpack churns out at the end that contains the compact bundle of the whole application with the dependencies intact.
Resolve
This attribute is to tell Webpack which files and folders to look into when building its dependency graph.
Babel
Before we continue to the next step, which involves writing fancy javascript codes, some Babel configuration is needed. Not all browsers are able to handle ES6 syntax. Therefore, we need to bridge the gap by adding a ‘babel-polyfill’ in the entry attribute. For the setup, babeljs.io has pretty neat steps and explanations. Babel-polyfill creates new functions on the fly for browsers that do not have the support for JS code that is above ES5. You can take a look at the browser compatibility table to check if a babel-polyfill is required for the project. This is not the complete configuration for the Babel, we will be adding babel-loader, later on, to provide a complete support for ES6 and above. The following, along with babel-polyfill, need to be installed for React projects.
npm install --save babel-polyfill
npm install --save-dev babel-preset-env
npm install --save-dev babel-preset-react
npm install --save-dev babel-preset-stage-0
For a setup of Babel, add a .babelrc in the folder. And add this piece of code:
What this specifies is the Babel presets. A preset is a set of plugins that supports particular language features. For example, ‘react’ preset adds support for JSX and ‘es2015’ for ES6 features.
To use Javascript features beyond ES7, these features can exist in various ‘stages’. The stages are defined as TC39 categories. So, to enable these features we use ‘stage-0’ as an idea phase or proposal but this helps us to write neat code.
{
    "presets": [
         "es2015",
         "react",
         "stage-0"
    ]
}
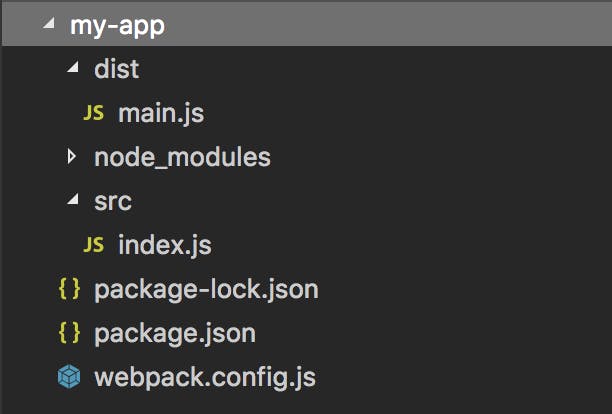
The setup up till this moment, should look something like this:
In 4.0
No entry and output point need to defined explicitly: it will take the index.js in the src folder as the default. (Though you can still override the default by stating the path in the script in package.json.)
Dev Server SETUP
This goes without saying, we need a development server to launch our application on the browser. Webpack provides us with its own dev server, webpack-dev-server.
Installing webpack and webpack-cli to be saved within this project.
npm install webpack-dev-server --save-dev
npm install webpack --save-dev
npm install webpack-cli --save-dev
All that needs to be done, is to add a devServer attribute to the above configuration. With this, we will have a simple dev server running that is serving files from the current directory.
Run server
Now to be able to run the server, we need to tap in the package.json of the application. In the “scripts” attribute of the object, we add a command to run webpack-dev-server with hot attribute enabled. The hot attribute, allows the server to watch for changes in code. If there are any changes done, it will refresh the page automatically.
'scripts': {
         'start': 'webpack-dev-server --hot'
}
To run this, we need to call the command:
npm start
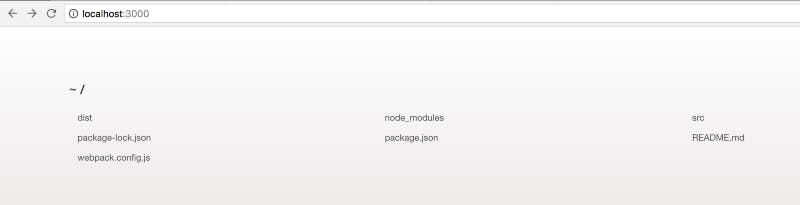
And voila! We can see the application running on localhost:3000.
In 4.0
This is as per Webpack 4.0 specifications as well.
For the initial setup, you may look at this Github Repo for guidance.
Up till this point, we have only scraped the surface of the Webpack. There’s still much to be explored. We are just getting to the exciting parts. The magic of Webpack lies in the ability to use loaders and plugins, which will be covered in Part II of this series.
References
- 4 Key Concepts of Webpack | Netlify
- Webpack is JavaScript module bundler that has taken the world by storm, but a lack of great docs and wealth of…www.netlify.com
- Extract Text Plugin
- In the last lesson, we got our styles working all good; getting the css and scss files bundled and then getting the…medium.com
- Plugins
- Installation Getting Started Asset Management Output Management Development Hot Module Replacement Tree Shaking…webpack.js.org
- webpack-contrib/file-loader
- file-loader – A file loader for webpackgithub.com
- DevServer
- Installation Getting Started Asset Management Output Management Development Hot Module Replacement Tree Shaking…webpack.js.org
- Webpack 4 Tutorial: from 0 Conf to Production Mode (Updated)
- webpack 4 is out! The popular module bundler gets a massive update. webpack 4, what’s new? A massive performance…www.valentinog.com