
Clair is one of the most popular open source tools providing static image scanning for container images. In my previous post, I had presented some background about CoreOS Clair and the way it works. In this post, I will be delving into Clair installation and integration with Klar and clairctl.
All work for this session was done in the Google Cloud environment.
The setup:
Setup 1 — Kubernetes cluster with 1 master node and 3 worker nodes.
Setup 2 — Single compute node running Docker (instance-1)
Other — Single compute node to interact with Clair APIs (instance-2)
Installing Clair
Clair can be installed in two different ways:
- Installing with Docker.
- Deploying on Kubernetes.
With docker, let’s assume you have a working docker environment.
#Creating the clair configuration directory
mkdir clair_config#Downloading the clair config files
curl -L https://raw.githubusercontent.com/coreos/clair/master/config.yaml.sample -o clair_config/config.yaml#Spinning up the Postgres container
docker run -d -e POSTGRES_PASSWORD="" -p 5432:5432 postgres:9.6
Important: The CVE database needs some time to update. Meanwhile, you can skip to the next step as the definitions will be ready only about 30 mins after the Postgres start time.
#Starting Clair with the config yaml in place
docker run --net=host -d -p 6060-6061:6060-6061 -v $PWD/clair_config:/config quay.io/coreos/clair:latest -config=/config/config.yaml
Clair API server runs on TCP:6060, while the Clair health API runs on TCP:6061. To verify, call the health API.
curl -X GET -I http://localhost:6061/health

To deploy Clair in Kubernetes, simply deploy Postgres and Clair in Kubernetes as a deployment.
#Download Clair secrets from the Release-2.0git clone --single-
branch --branch release-2.0 https://github.com/coreos/clair#Create Clair secret
kubectl create secret generic clairsecret --from-file=./config.yaml

#Create Clair deployment, this will spin up Postgres and Clair pods.
kubectl create -f clair-kubernetes.yaml#Verify
kubectl get pods
kubectl get services
kubectl describe service clairsvc
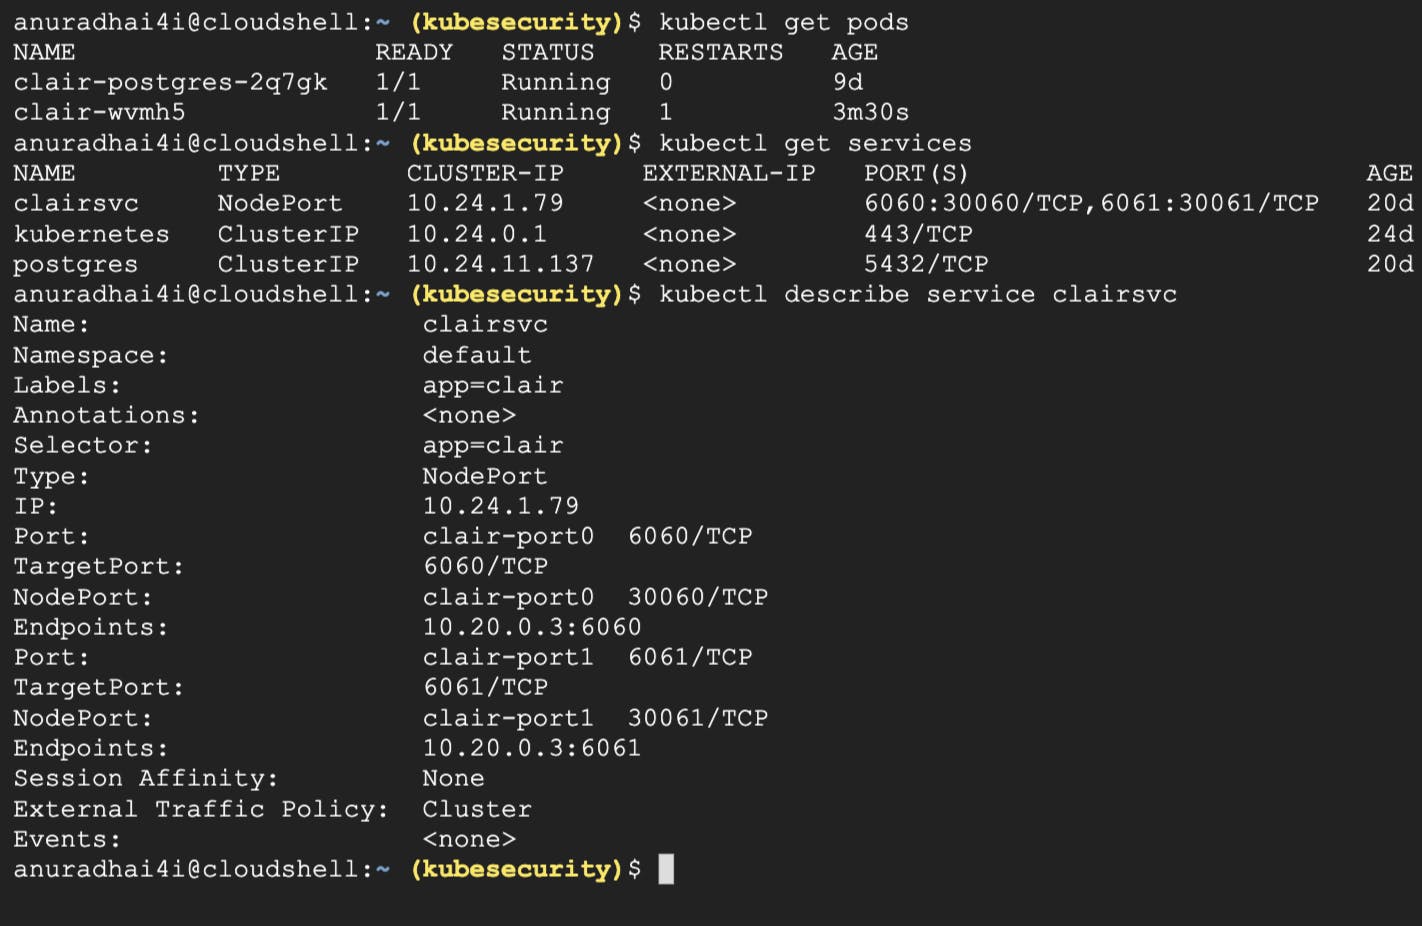
As seen here, Clair is running at NodePort TCP:30060, and can also be accessed with the endpoints 10.20.0.3:6061 and 10.20.0.3:6060. So, let’s access from instance-2.
curl -X GET -I http://10.20.0.3:6061/health

Now that the Clair setup is ready, let’s try using some Clair client tools to run some scans and analyses.
Clair with Klar
Klar is a very simple and lightweight command-line tool that doesn’t require any installation. Simply download and copy the binary file to a location available in the $PATH.
#Download the desired klar binary form the klar github site.
wget https://github.com/optiopay/klar/releases/download/v2.4.0/klar-2.4.0-linux-amd64
Look up https://github.com/optiopay/klar for more information.
Running an image scan with Klar:
CLAIR_ADDR=10.20.0.7:6060 \
CLAIR_OUTPUT=High \
CLAIR_THRESHOLD=10 \
DOCKER_USER=anuradhai4i \
DOCKER_PASSWORD=xxxxxxxx \
klar anuradhai4i/release_1.0
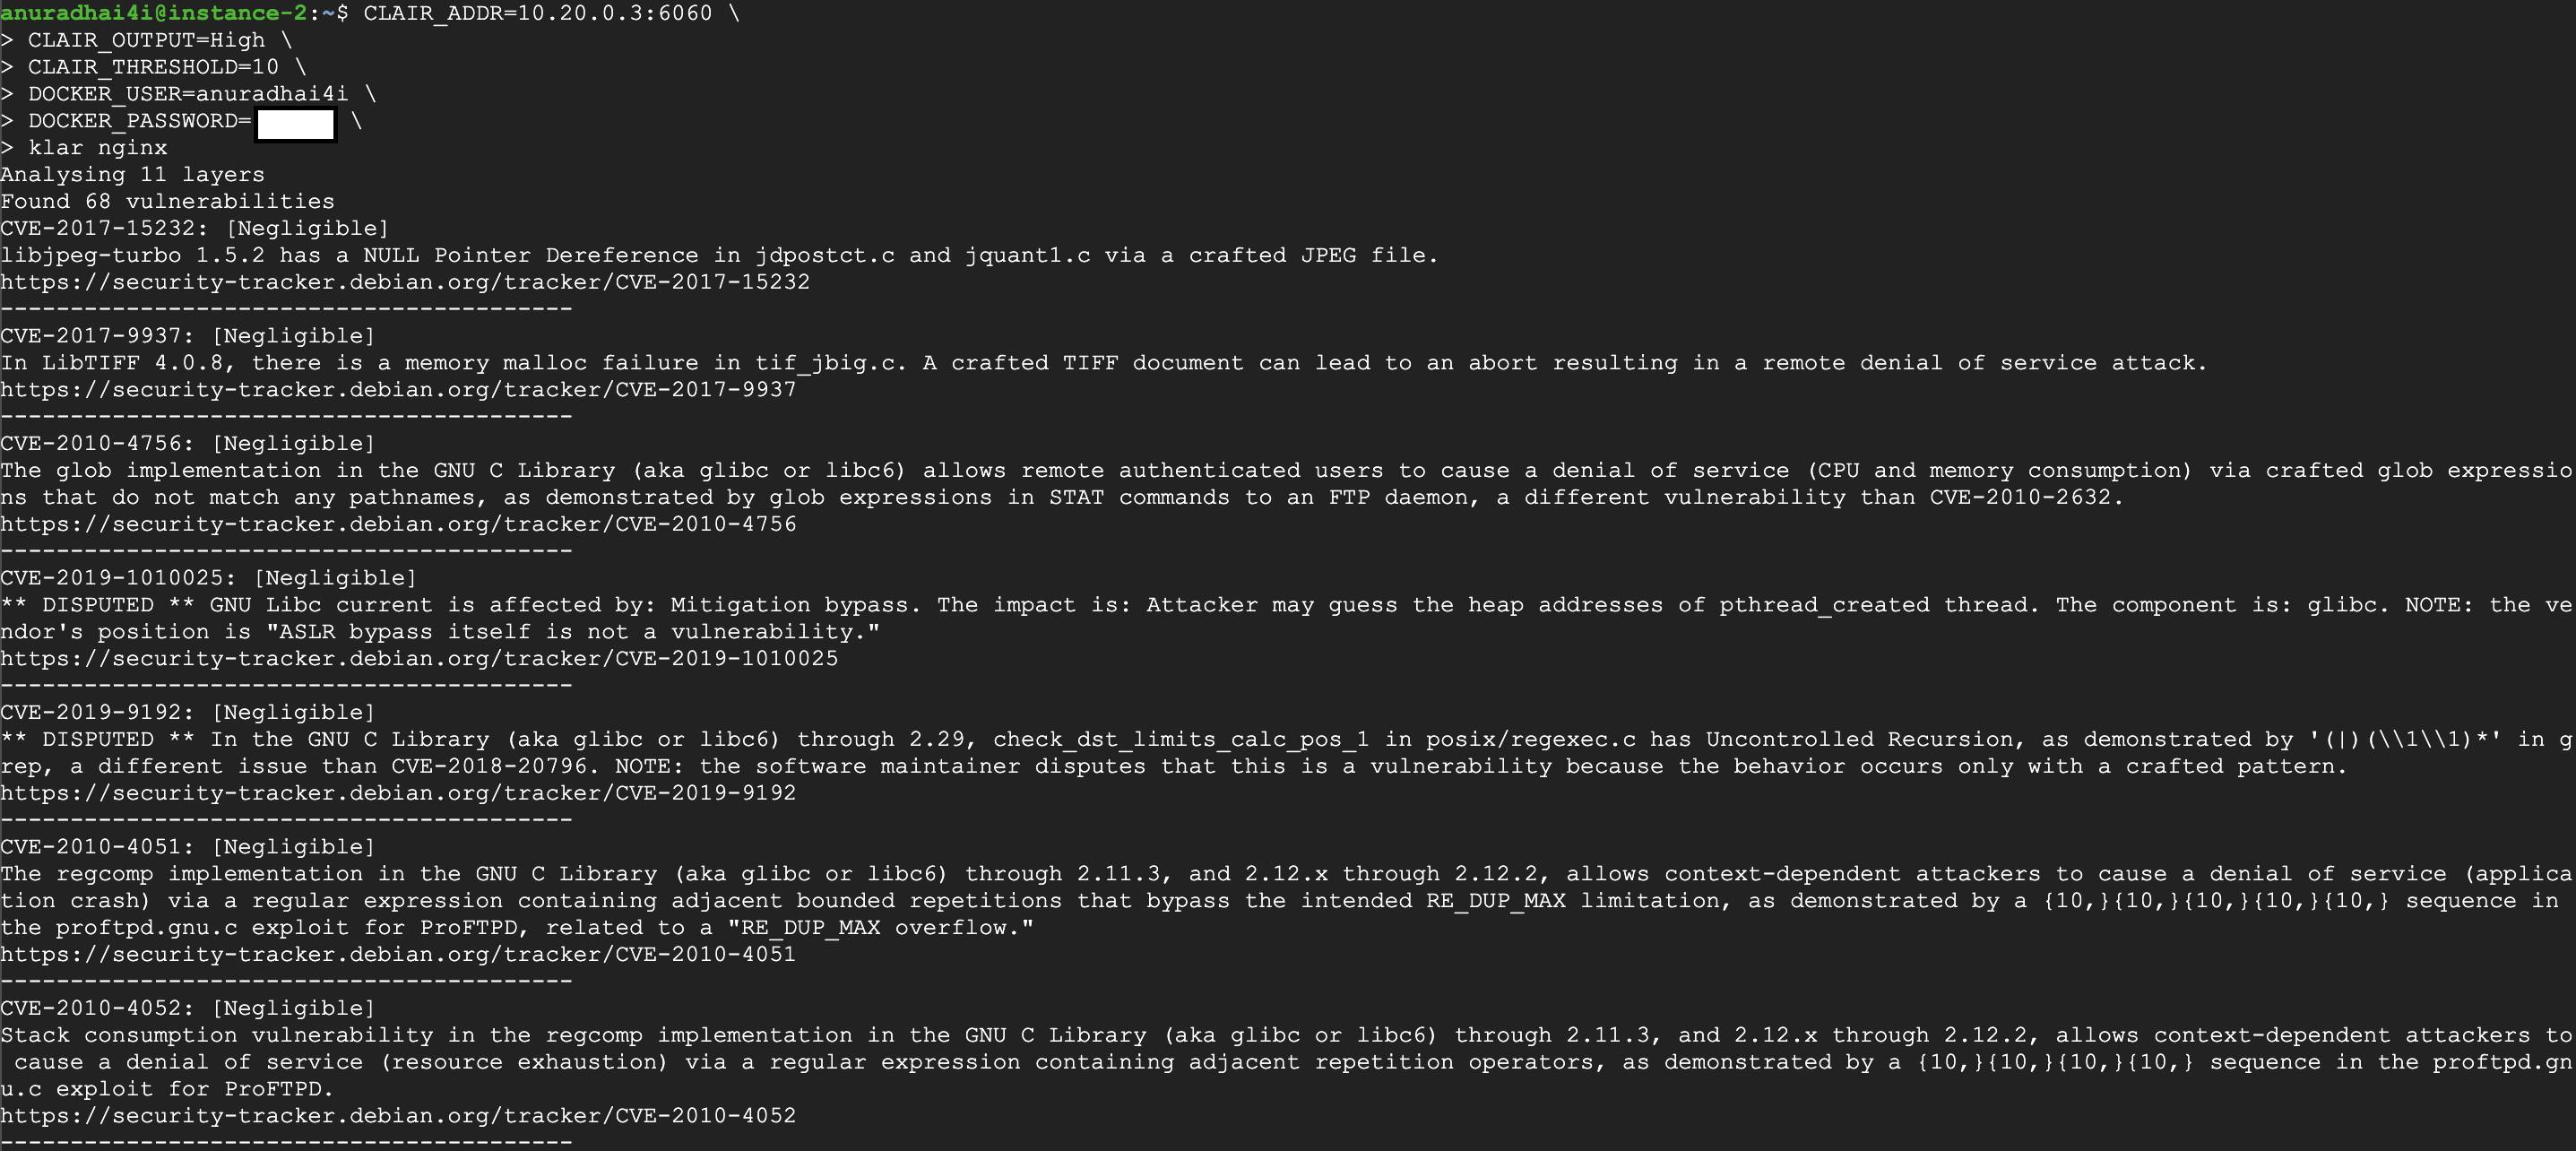

Please refer to the detailed documentation for Klar command-line parameters.
Clair with clairctl
Download the clairctl binaries from the release page and add the location to the $PATH.
wget https://github.com/jgsqware/clairctl/releases/download/v1.2.8/clairctl-linux-amd64
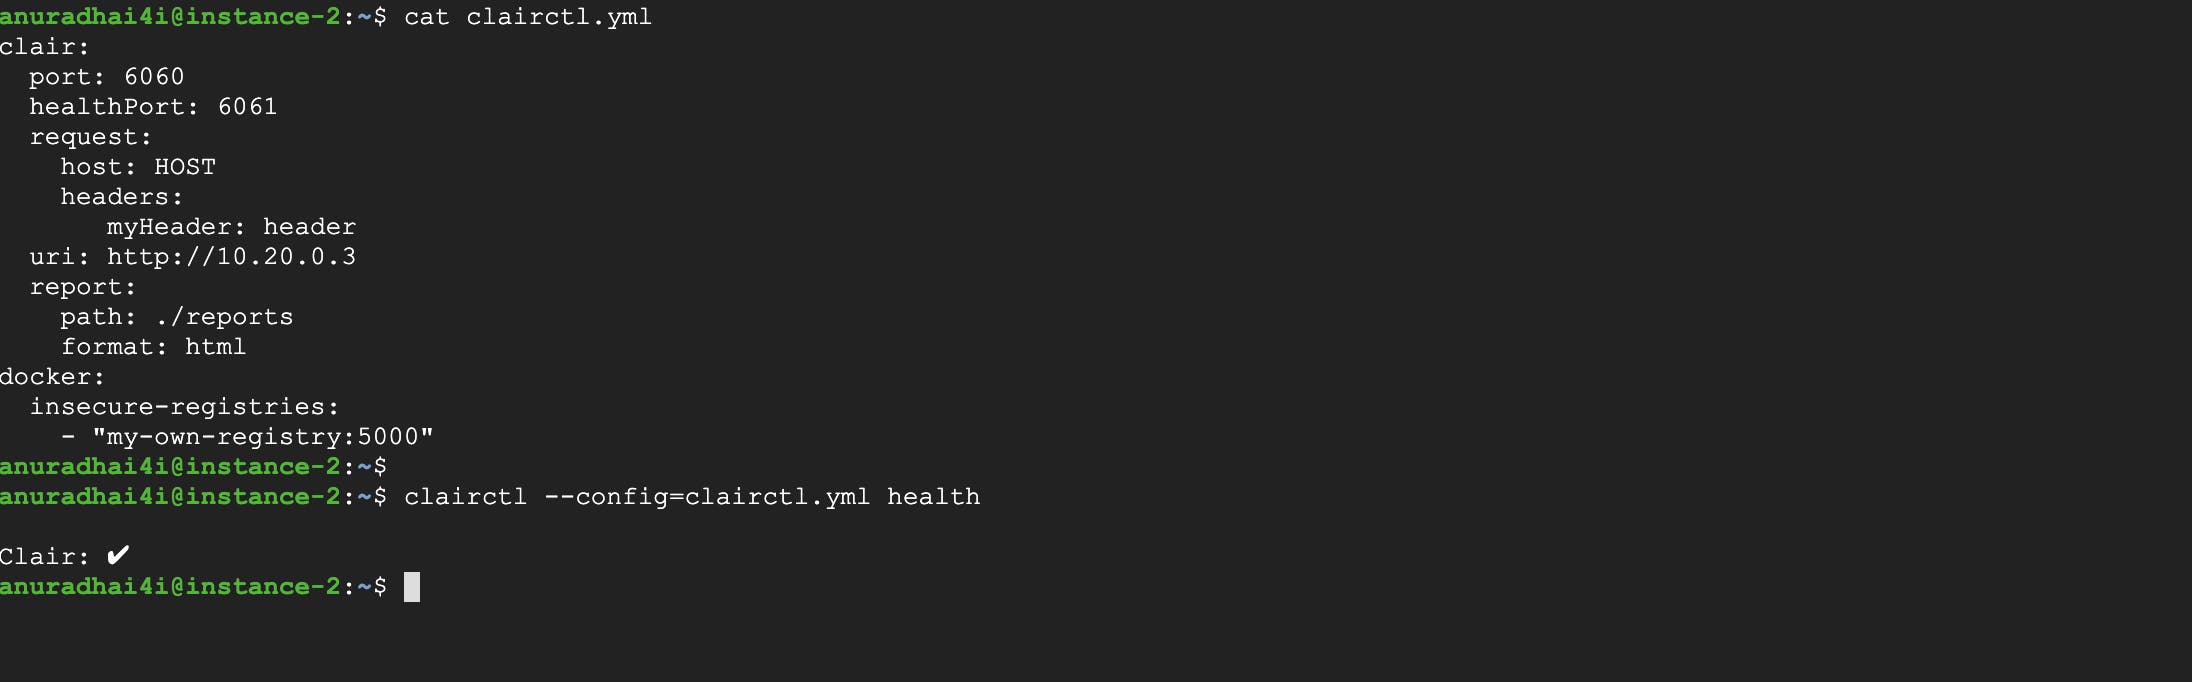
clairctl needs some basic configuration stored in a file clairctl.yml, so we need to save the following content in clairctl.yml and update the content accordingly.
clair:
 port: 6060
 healthPort: 6061
 request:
 host: HOST
 headers:
 myHeader: header
 uri: http://10.20.0.3
 report:
 path: ./reports
 format: html
docker:
 insecure-registries:
 — “my-own-registry:5000”
Don’t forget to create a report directory in the desired location and update the clairctl.yaml. Now we can check the health:
clairctl --config=clairctl.yml health
The result should come back as a success if Clair is properly deployed and its endpoints are reachable!
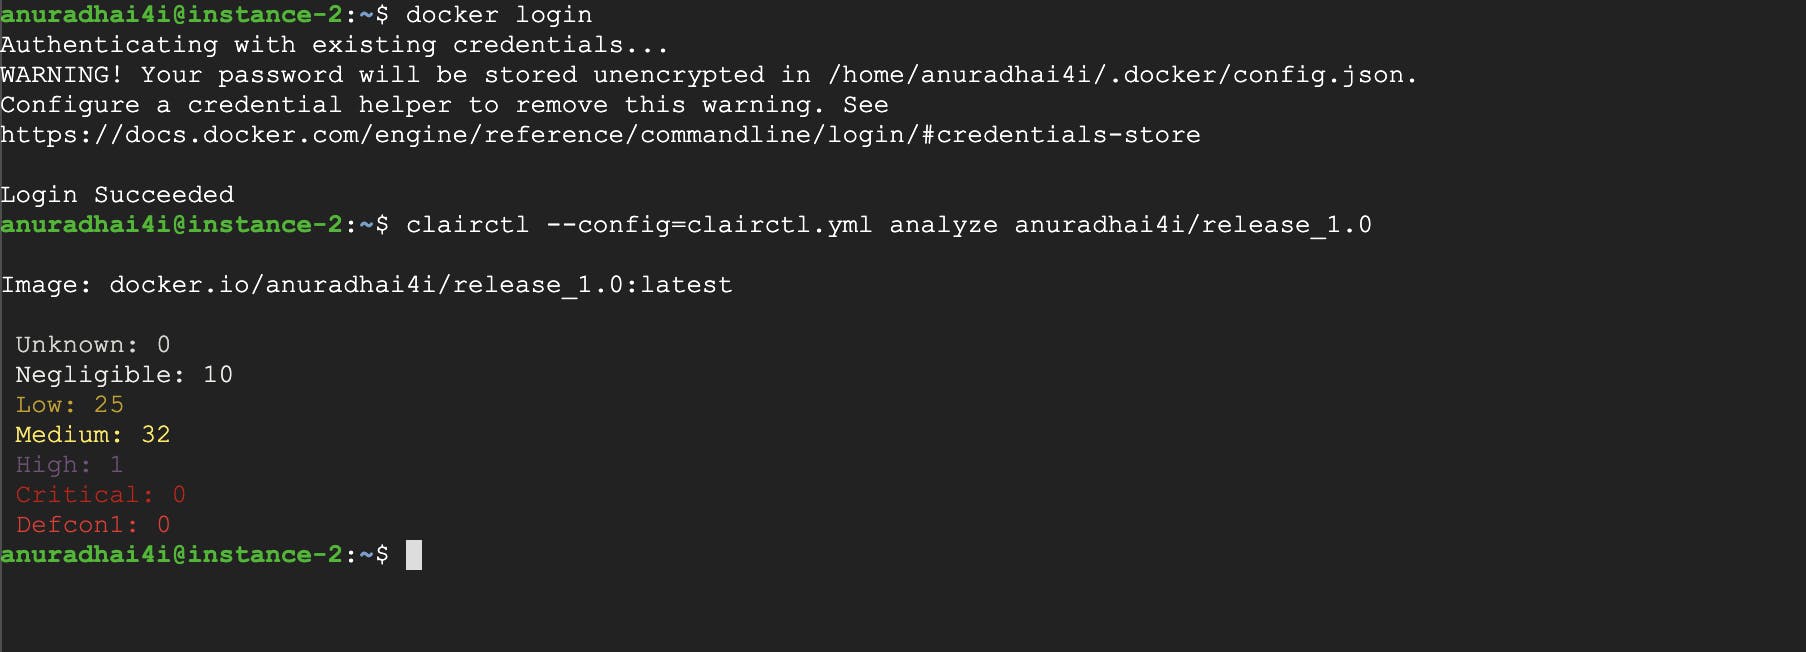
Hurray! We can now scan the image. But before that, ensure that you are logged in to the docker hub with the docker login from the command line.
Just like in the previous example, the scan results can be seen in the text format.
Similarly, executing clairctl with report instead of analyse will generate a scan report.
clairctl --config=clairctl.yml report anuradhai4i/release_1.0
This will create and store HTML reports in the location specified in the clairctl.yml

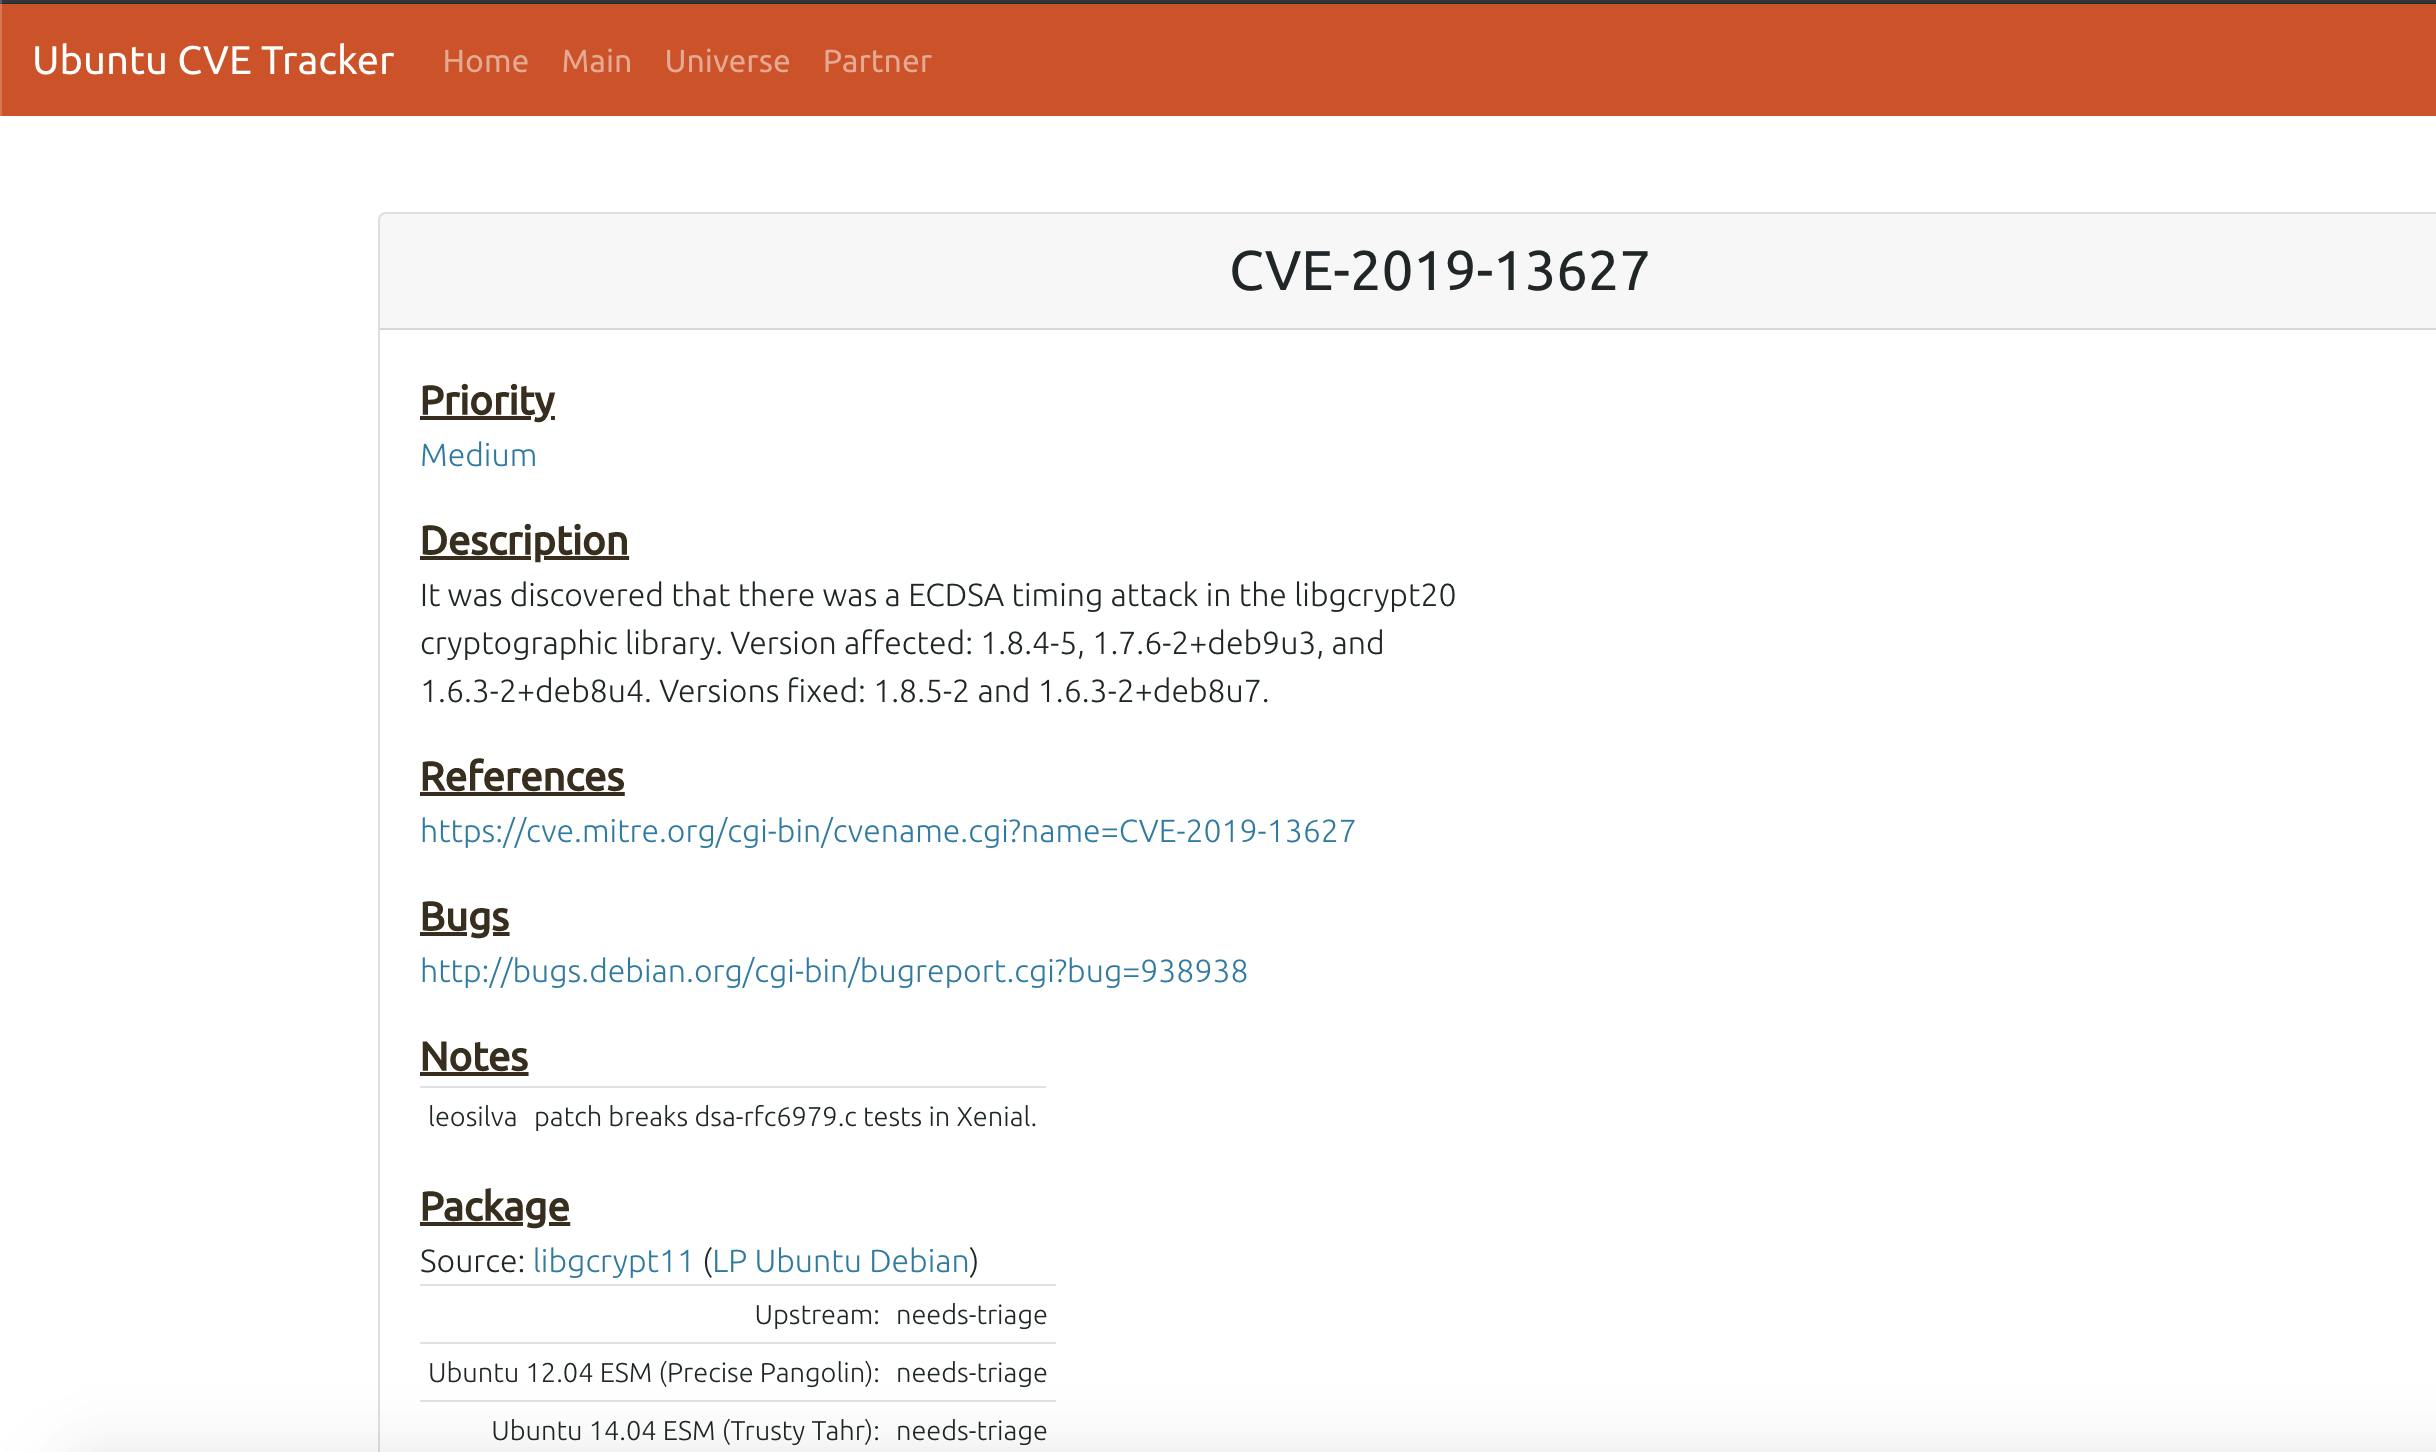
And the report will look something like this:
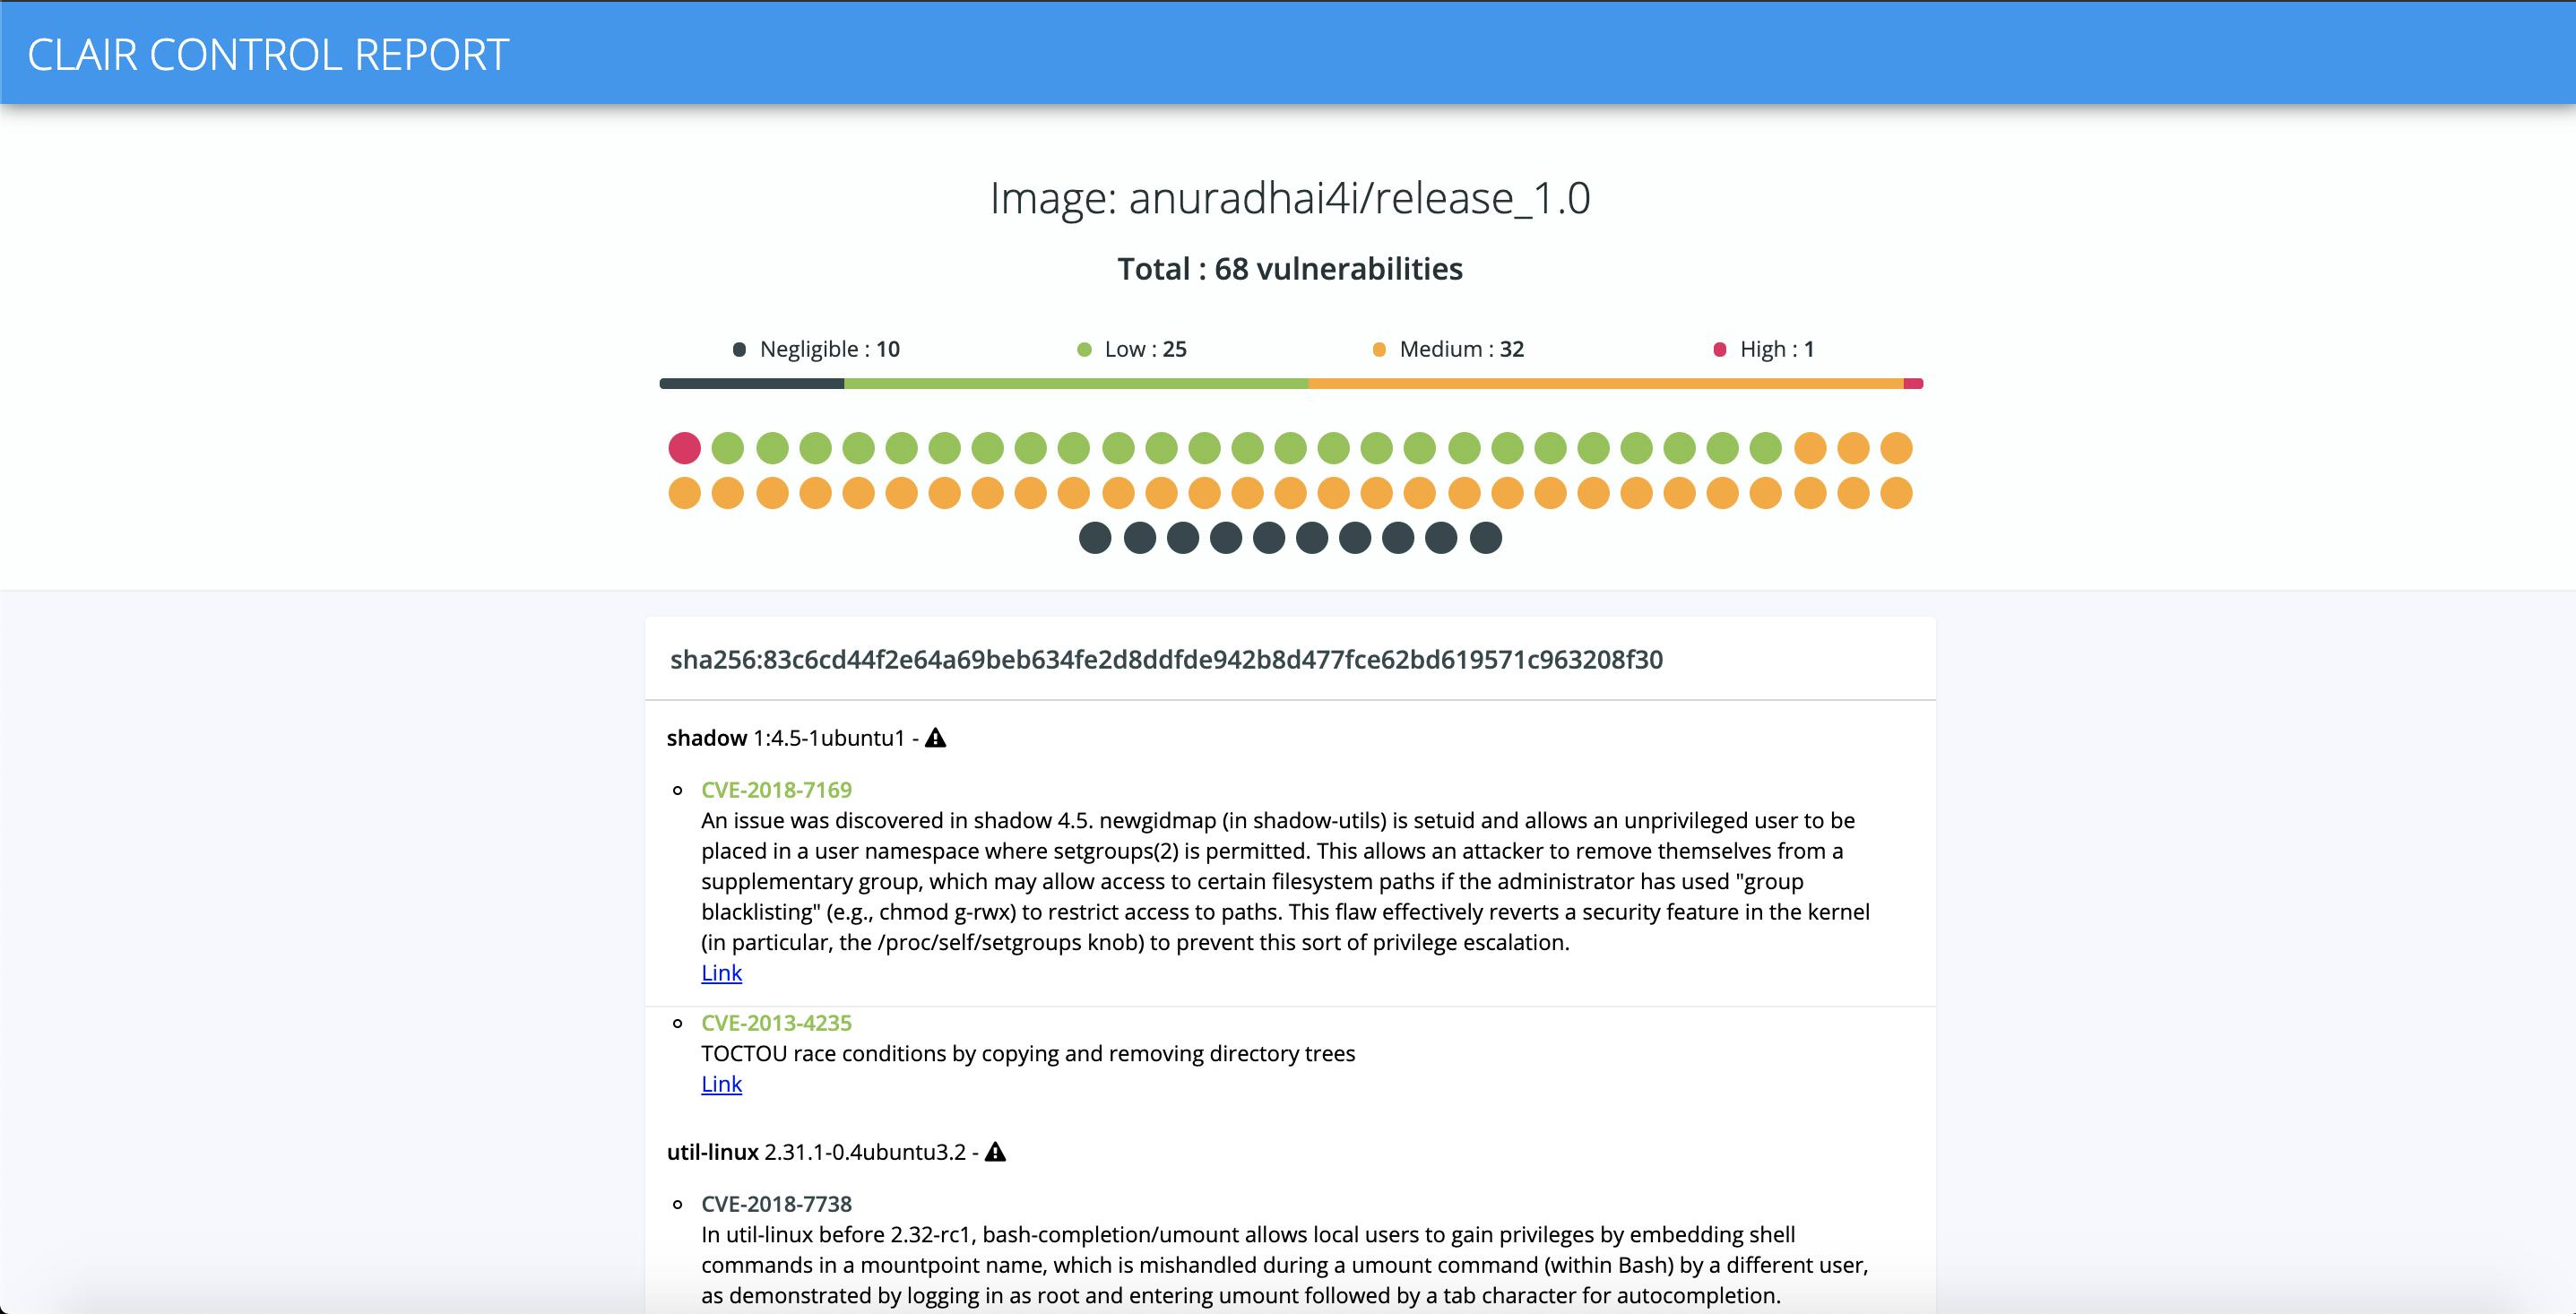
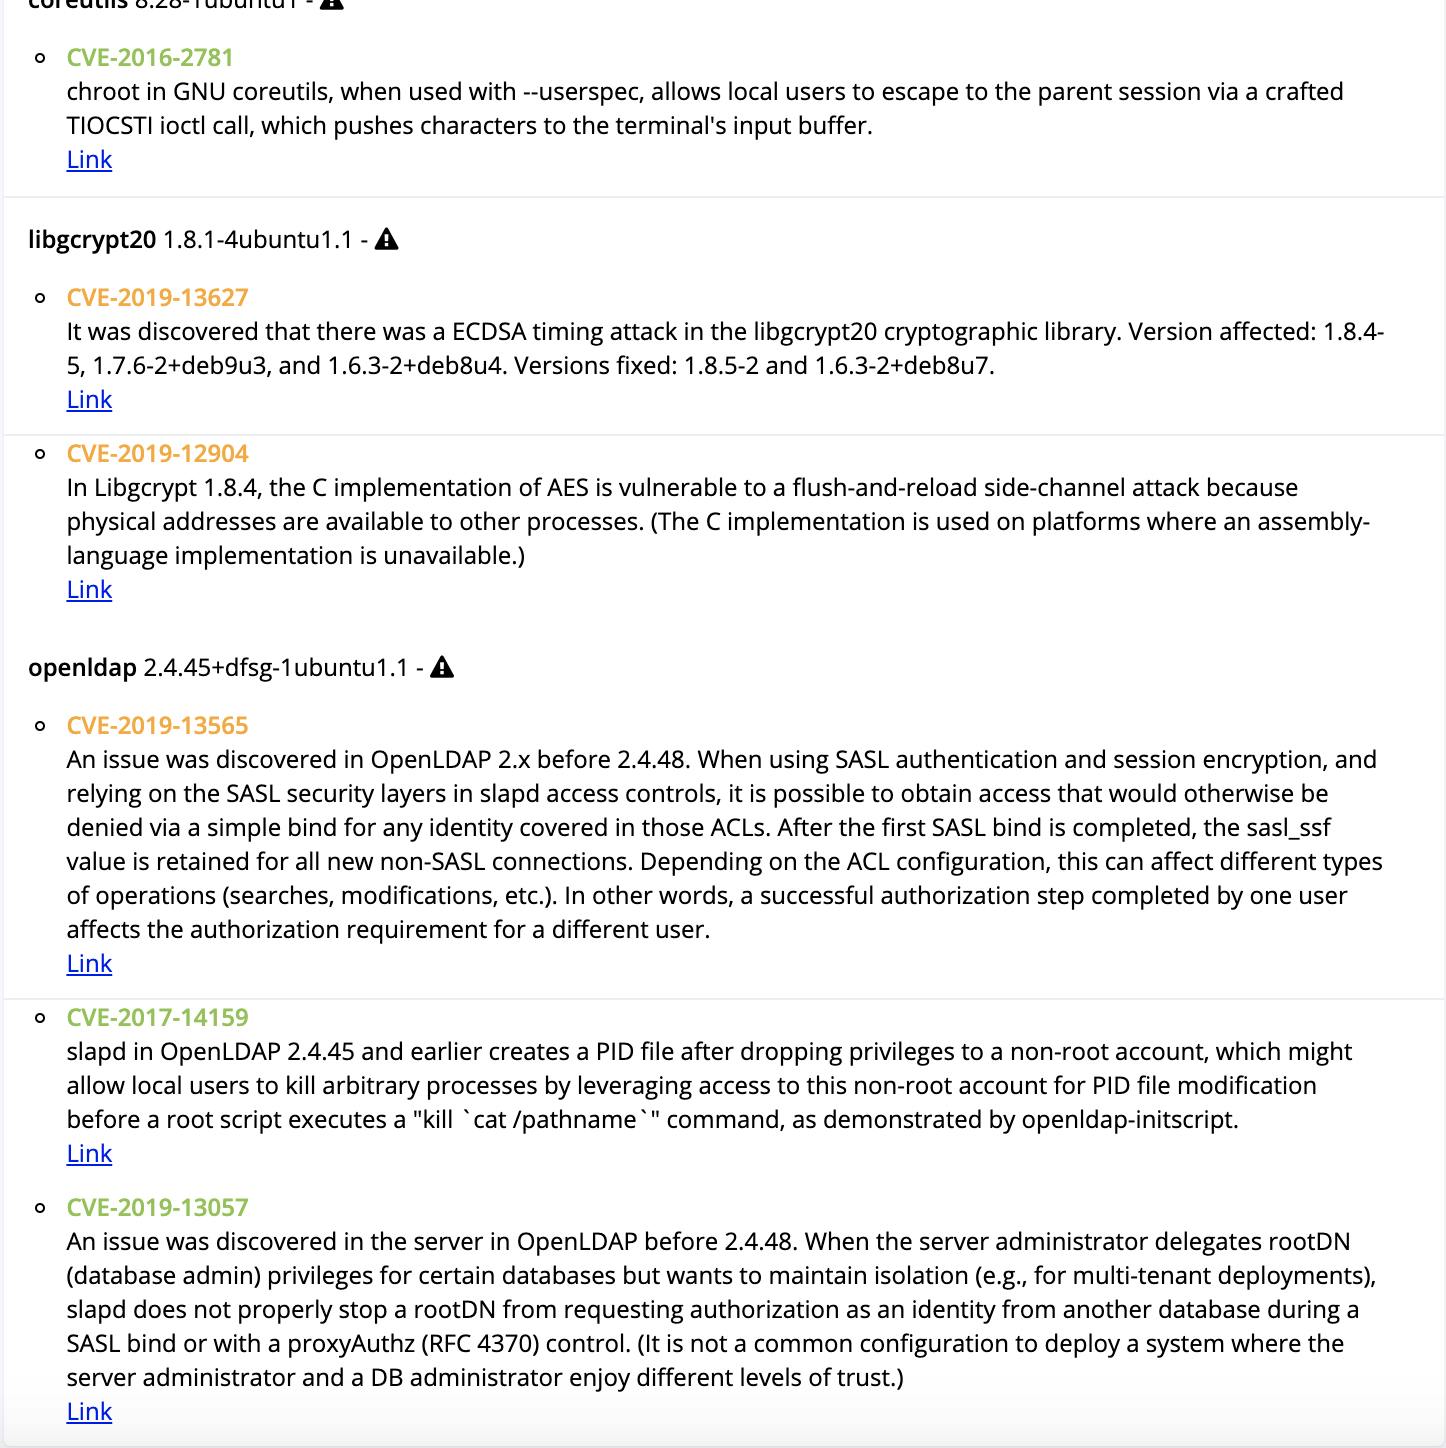
To conclude, the links given at the end of each vulnerability description is linked with the relevant CVE update and definitions. More details and fixes can also be found for each issue.
Further reading
leahnp/clair-klar-kubernetes-demo
Build, Collaborate & Integrate APIs | SwaggerHub
Static Security Analysis of Container Images with CoreOS Clair