
As promised, I'm back with a follow-up post. This time, it’s mostly for developers who want to understand how to implement BDT in their Spring Boot Applications.
Let’s do it step by step.
Step I — By defining my acceptance criteria, I make sure I always have a story to work with. My tests are as good as the acceptance criteria. Over the years, BDT has moulded me to understand the functionality first. The more I try to understand the functionality, the more I ask questions during inception or grooming. This helps me clarify each and every doubt I have and push the BAs to add all these clarifications in the acceptance criteria. Since we are not BAs, let’s assume we have a well-written story with acceptance criteria. Usually, users are greeted with “Hello World” when they browse our application.
Step 2 — Another best practice that I follow is TDD. I write my tests first and code later. The tests I write will fail, and then we will write code to fix it. So let’s write a “feature file”. A feature file has an extension of “feature”. Feature files will have a scenario and steps to test that scenario. Let’s name the file “bdt.feature”. The following is the content of our feature file:
“Scenario: Welcome Message
Given BDT Application is up
Then when we browse to the application we are greeted with a welcome message”
Since I am assuming that the readers already know how to set up a bare minimum Spring Boot Application, I am not going through the steps of writing one. For now, I have a main method of a Spring Boot Application and nothing else. I will be committing to the git repo while I am writing this. The URL to the repo is here. See commit number “b1a905d0298cc3d7065460982ec78e1c614f4f00”.
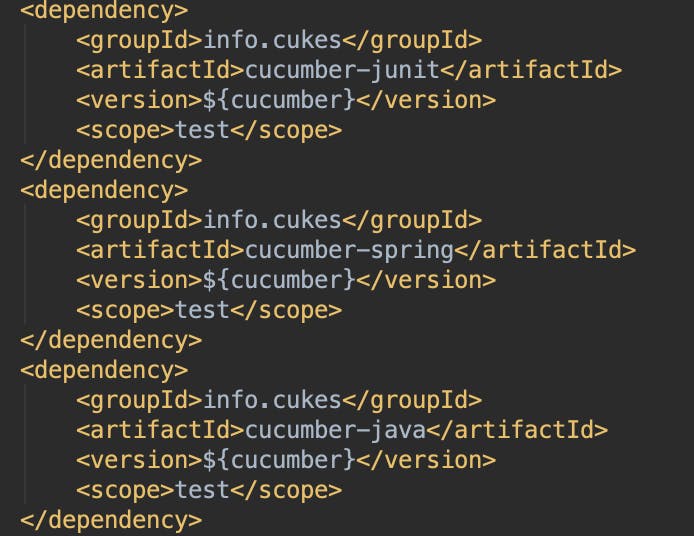
Step 3 — Now that we have the steps to test a scenario, let’s set up the testing framework. The first thing we do is to bring in all the maven dependencies.
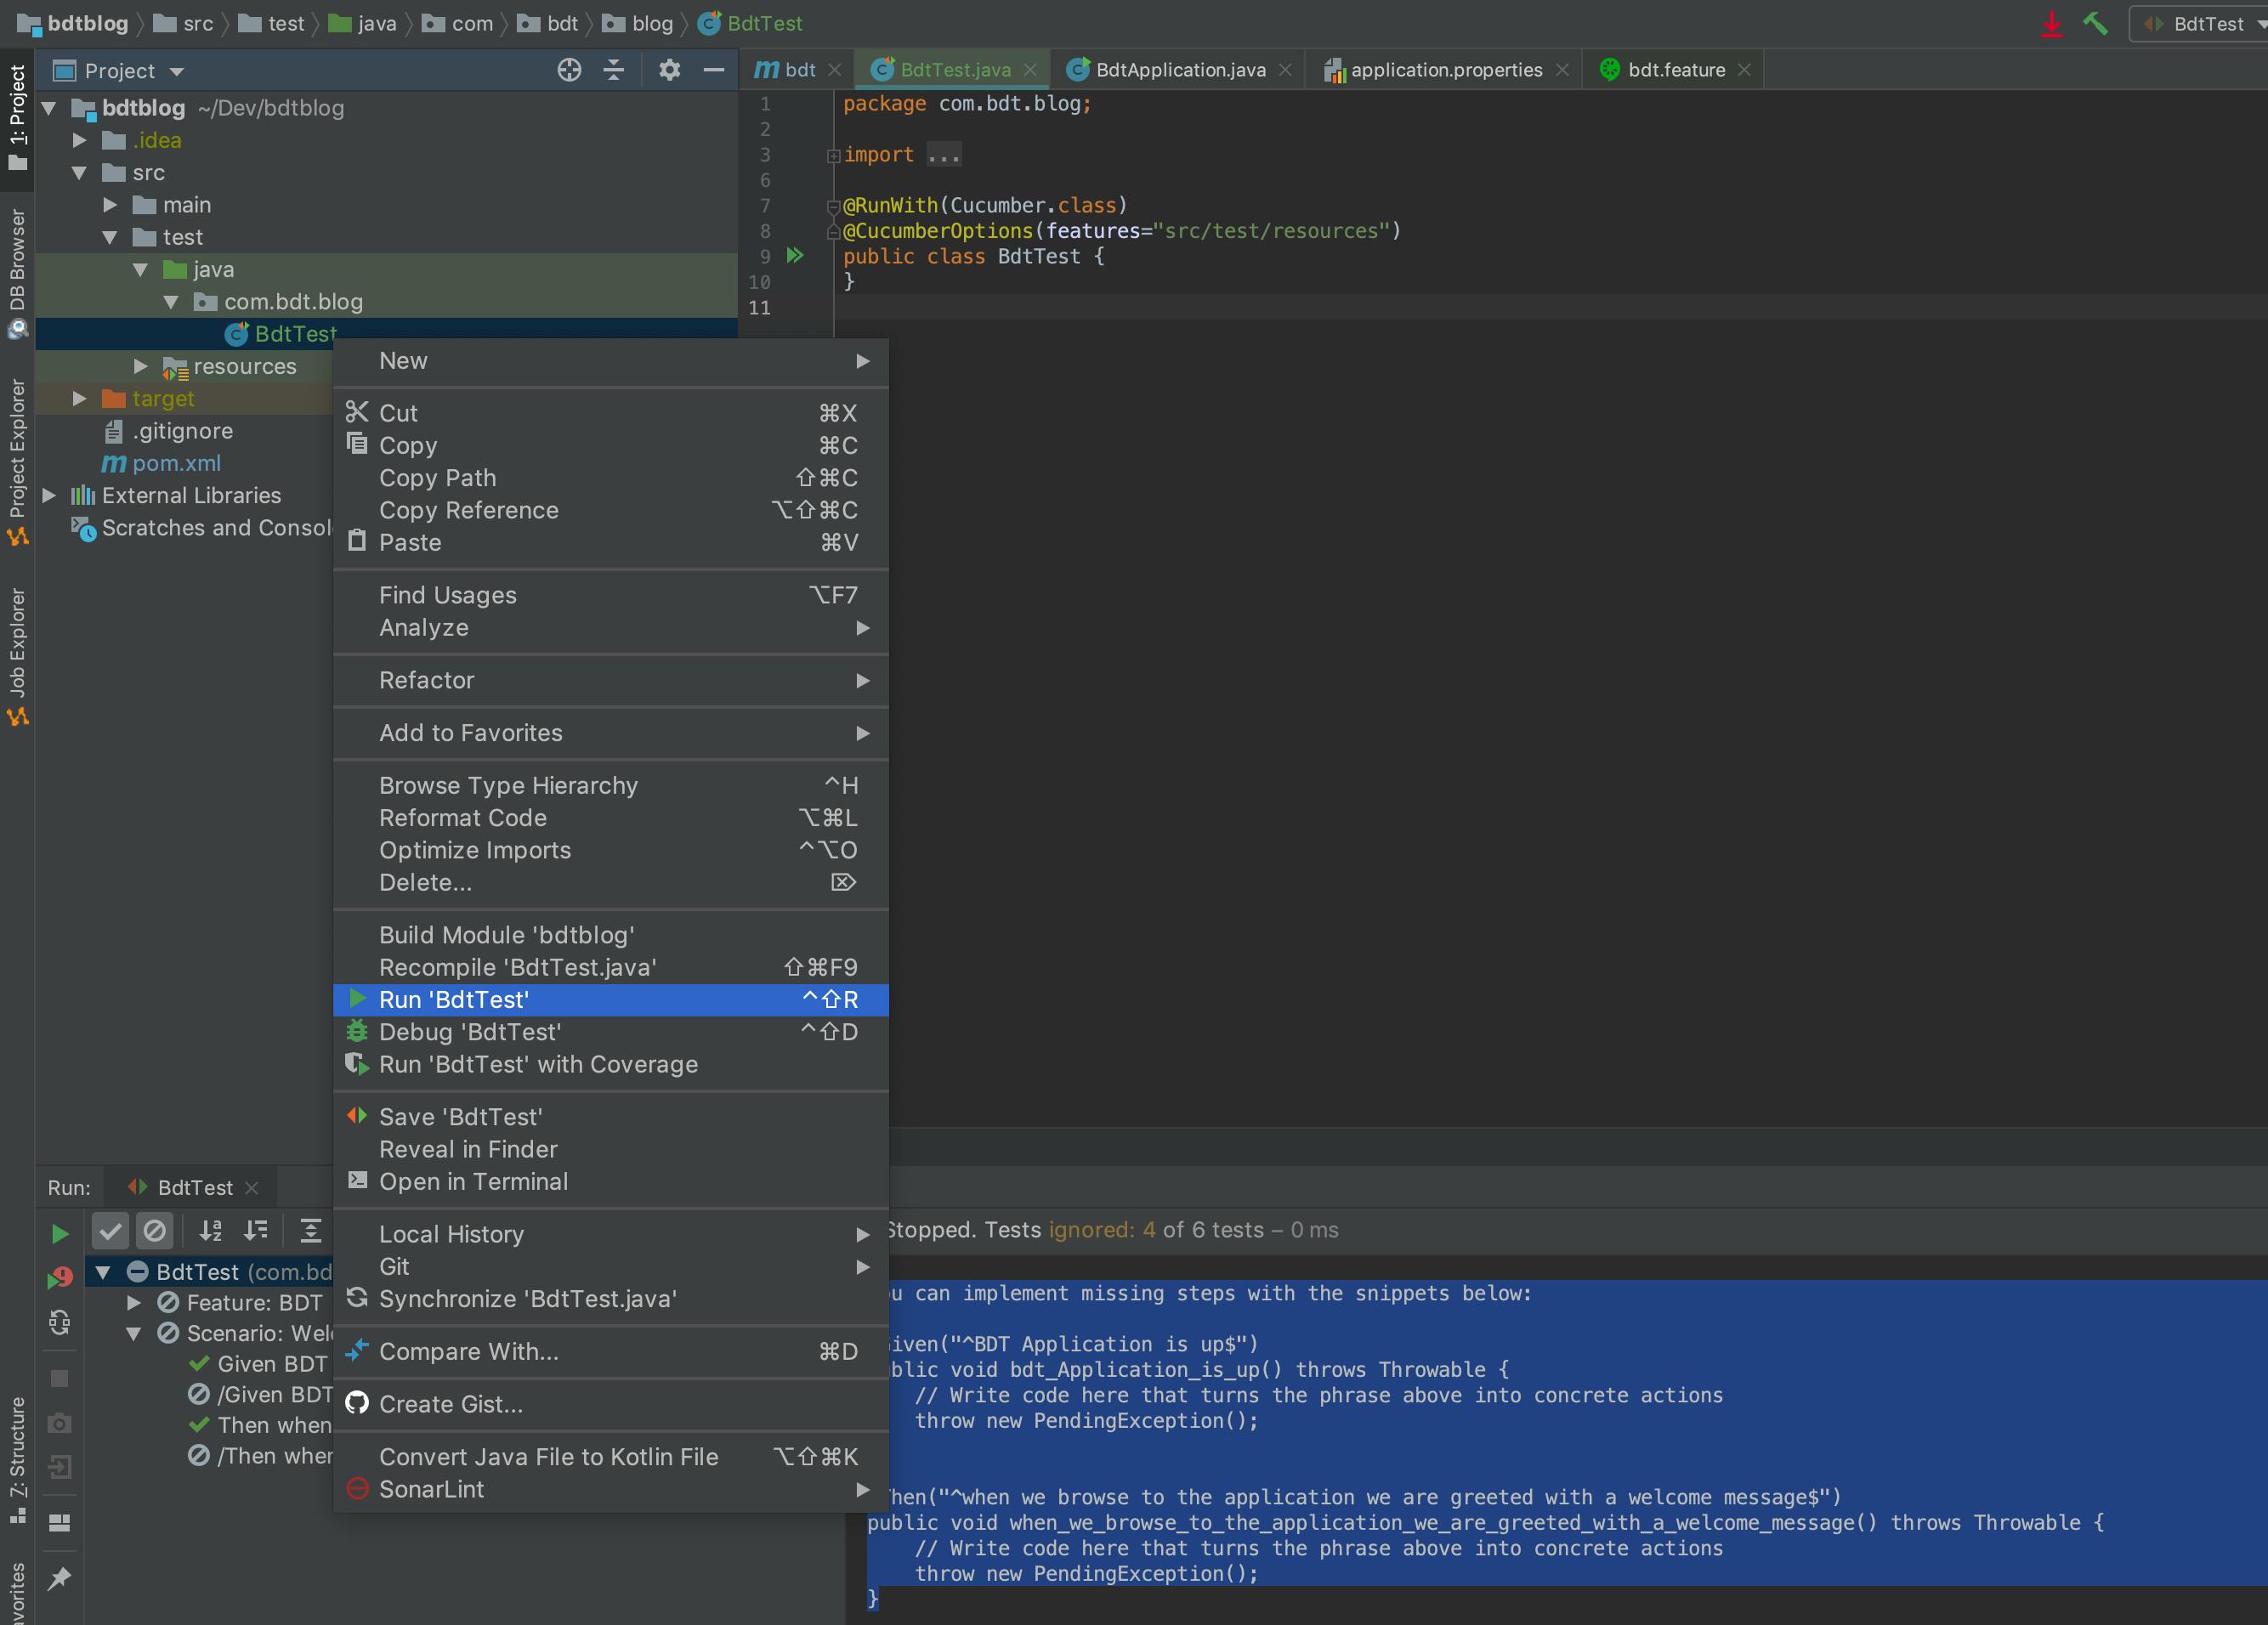
Once the dependencies are in, we need to write our Steps file that implements all the steps that we have written in our feature file. We also write a class named “BdtTest” that binds the feature file to the Steps file. To auto-generate step functions from the feature file, simply right-click the “BdtTest” class and say “Run BdtTest”. Cucumber will then spit out the missing steps and the snippets to implement them.
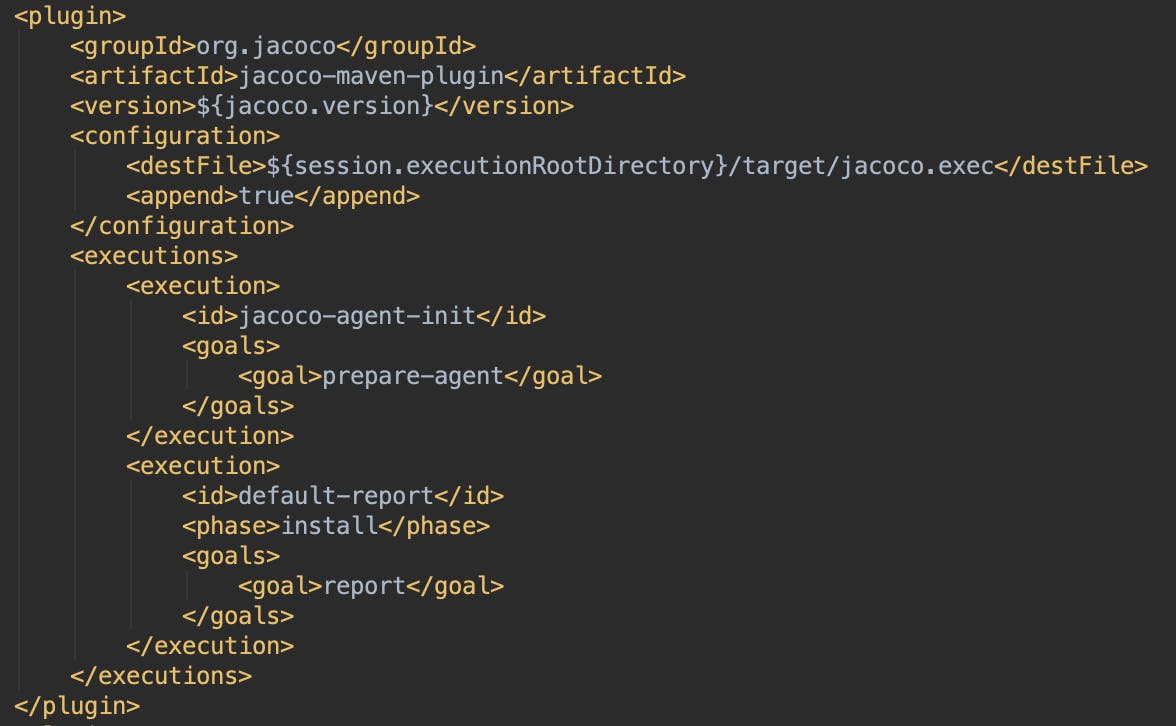
Simply copy these snippets into your Steps class and our test setup is ready. For code coverage, we just need to add the Jacoco maven plugin.
Let’s push the changes to git (Commit 4471560e3a95efa099526d1246ef595f8f886d4e).
Step 4 — Before we write the implementation for the steps, let’s understand what is going on.

This will load the Spring Context. In our case, we are loading the whole Spring Boot Application.

It loads a WebServerApplicationContext and provides a real web environment. Embedded servers start and listen on a defined port (from your application.properties or test.properties) or on the default port of 8080.

The @LocalServerPort annotation can be used to inject the actual port into your test.
Ok, let’s implement the step now. We need to call a REST GET API that would give us a “Hello World” message. Let’s call this API through a rest template and assert the response that we get. Since it’s a GET, we call the Rest Template “getForEntity” method. We need to pass the response type of the call which is GreetingMessage.class. We have a compile-time error as we have not written this class yet. So let’s write it first. It’s just a POJO with a property named message. If we run the test now, we know that it will fail as we have not written the API yet. So let’s catch the HttpClientErrorException and throw an AssertionError. Ok time for another git push (Commit 8fe53fbffb7846eb795b7536b413341c49c98ea4).
Step 5 — Let’s make our tests pass. We now write our controller and service class. Tada! Our tests are now passing. Time for committing(Commit 0d87d1743bb690d4acc34a6c1bb016190f791fc7)
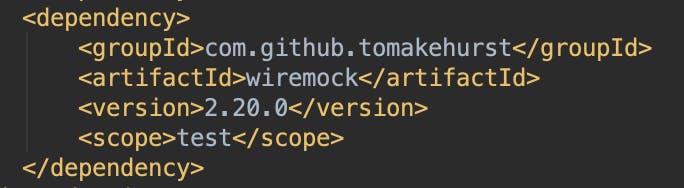
Step 6 — Let’s complicate matters by a bit now. Let’s say the “Hello World” message is actually passed to our Service class from a third-party application that is hosted in localhost:8888. For practical purposes, this can be any third party application such as MyInfo or Google. But during our test, we cannot rely on this service, so we shall mock it up. To mock this, we bring in a maven dependency of wiremock.
We set up a wiremock server before we run our tests.
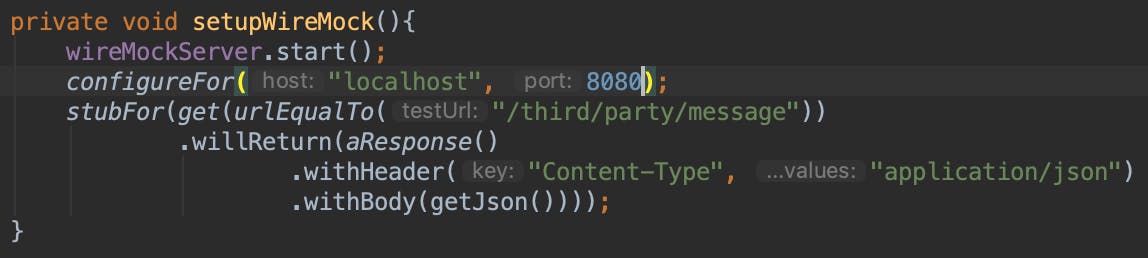
And shut it down after we are finished.

We then stub the GET request to third-party service and return a JSON. This JSON is then parsed by our Service class and is ultimately given back to the client, which in this case, is our test. Let’s save our code first and then we can go through some explanations (Commit a375b2c8ef844fddb64d6c85718da8330b56b888).
Let’s understand the code now. Basically when we start the test, we also start a wiremock server at localhost:8080. The wire mock server intercepts calls made to localhost:8080 and matches the URL with the actual stub that is configured. And when it matches, it returns the stub response, which in our case, is thirdparty.json. Now the question is — the third party service is hosted at http://localhost:8888, so how we are hitting localhost:8080 during a test. We are able to change this during the test, since we have externalised the domain and port.
In application.properties, we have added the following:

In test.properties, we have added the following in our test > resources folder:

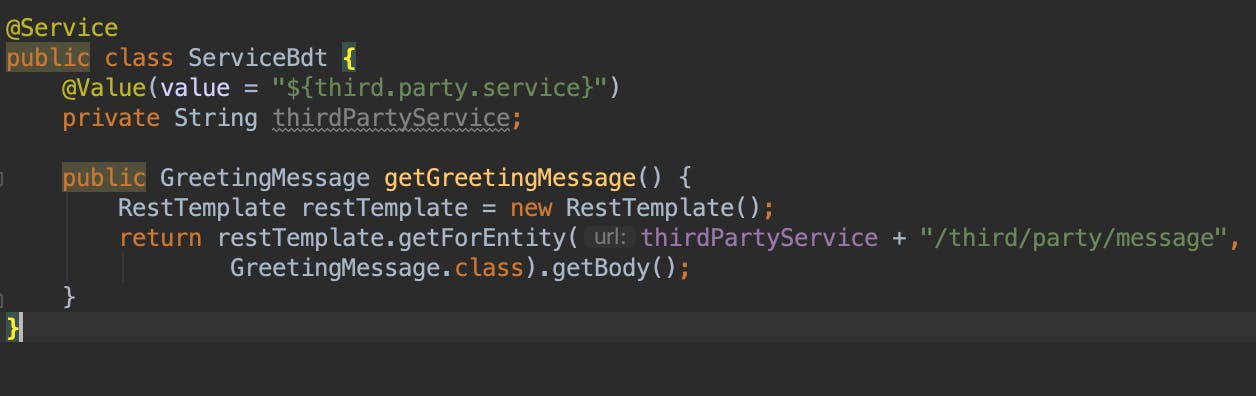
We read this property in our Service class through a Value annotation and pass it to our rest template URL.
Now the only question left is how will our Spring Boot Application know how to read the test.properties. This is done by the below line:

Spring Boot will read application.properties but will override it with test.properties whenever it finds a matching property.
And that’s it! I hope you are feeling a little more comfortable jumping on the BDT bandwagon. As promised, in the first part of my post, I will come up with a very short third part, which shows you how to do a unit testing of a private method.